Noua directiva Europeana UE 2023/2673 impune tuturor magazinelor online care vând către cumpărători din UE să ofere un „buton de retragere” clar vizibil, o modalitate ușoară prin care cumpărătorii își pot exercita dreptul de retragere existent de 14 zile (cunoscut și sub numele de „perioadă de reflecție”).
Exemplu meniu footer:

Functionalitati principale ale solutiei xConnector
Solutia de retur xConnector permite gestionarea cererilor de retur si schimb de produse direct din magazinul Shopify.
Prin formularul de retur, clientul poate:
plasa o cerere de retur pentru comanda
plasa o cerere de schimb de produse;
solicita retragerea din contract, inclusiv inainte ca produsele sa fie expediate, daca aceasta optiune este activata in setari.
In xConnector, magazinul poate configura urmatoarele optiuni:
activarea cererilor de retur doar pentru comenzile fulfilled, adica pentru comenzile expediate sau marcate ca fulfilled in Shopify;
activarea cererilor de retur atat pentru comenzile fulfilled, cat si pentru comenzile unfulfilled, astfel incat clientul sa poata solicita retragerea din contract si inainte de expediere;
activarea unei liste predefinite cu motive de retur;
activarea unei liste cu metodele de retur disponibile;
activarea unui camp pentru adaugarea de detalii suplimentare din partea clientului;
setarea unui tag pentru produsele nereturnabile.
De exemplu, dacă un produs are tagul „nereturnabil”, clientul nu va putea plasa o cerere de retur pentru produsul respectiv. Atentie! daca folosesti acest formular si pt anulare comanda- nu folosi optiunea tag pt ca altfel nu se poate plasa cererea de anulare. Functioneaza cand ai in paralel alta optiune doar pentru anulare comanda.
Gestionarea cererilor in xConnector
In xConnector, cererile de retur, schimb de produse si retragere din contract sunt centralizate intr-un meniu separat: Return request.
Din acest meniu, magazinul poate:
- vizualiza toate cererile primite intr-o lista centralizata;
- avea o privire de ansamblu asupra tuturor cererilor;
- filtra cererile in functie de motivul selectat de client;
- verifica detaliile fiecarei cereri;
- urmari mai usor cererile primite si stadiul acestora;
- gestiona mai eficient procesul de retur, schimb sau retragere din contract.
- generarea de awburi de retur
-----------------------------------------------------------------------------------
Configurare:
Adaugarea formularului de retur pe site
Adaugarea formularului de retur pe site
Pentru a adauga formularul de retur pe o pagina din magazinul tau, urmeaza cei 4 pasi de mai jos:
1. Adaugă formularul de retur în pagina Shopify dedicată retragerii din contract (In Footer pentru a fi vizibil cand se acceseaza pagina)
- Shopify → Online Store → Pages → Add page
- Title: „Retragere din contract" (sau „Formular de retur")
- Content: procedura de retur cât mai detaliată (termene, condiții, cine suportă costul, ce produse sunt exceptate) + formularul, conform specificației de mai jos
- Save
2. Adauga codul Java din xConnector in pagina de retur:
Copiaza codul din xConnector - Profile - Tools - Return request
- Acceseaza pagina de retur din Shopify
- Click pe Show HTML

- Aici insereaza codul Java copiat din xConnector. Il poti adauga oriunde in pagina (inainte de text, dupa text sau chiar in interiorul textului). In exemplul de mai jos, codul este inserat la finalul textului din pagina.

- Save
3. Adauga elementul de securitate in Shopify astfel incat scriptul de return request sa se poata autentifica cand acceseaza serverul xConnector.
Se adauga acces token-ul in Shopify - Online store - Themes - Click pe '…' - Edit code - Cauta fisierul theme.liquid - Click pe theme.liquid
Editeaza tema
Cauta fisierul theme.liquid

- Copiaza codul de acces din xConnector - Profile - Tools - Acces token si adauga-l in fisierul theme.liquid
- In interiorul fisierului cauta elementul </head> si insereaza codul de acces imediat inainte de acesta sub forma de mai jos:
- adaugi <script>
- inserezi codul de acces din xConnector
- adaugi </script>
- Save
Exemplu:
Am cautat in fisier elementul </head>, am inserat textul <script>, apoi codul de acces din xConnector, apoi am inchis scriptul prin </script>, apoi am salvat.

4. Personalizeaza modulul de retur bifand optiunile dorite:
- xConnector - Profile - Tools - Return request
- Bifeaza optiunile
- Save
Verifica rezultatul setarilor pe siteul tau, plaseaza o comanda de test si apoi testeaza si formularul de retur.

Dupa instalarea formularului pe site, recomandam sa faceti un test complet: plasati o comanda folosind o adresa de e-mail reala, apoi trimiteti o cerere de retur din formular.
Astfel, puteti verifica intregul parcurs al cererii, de la transmiterea solicitarii de catre client, pana la procesarea acesteia in xConnector si generarea efectiva a AWB-ului de retur.
Exemple pentru configurare
Configurarea formularului se face in xConnector - Profile - Tools - Return requests
- La alegere se poate activa tip de retur
Cum apare pe site

Cum se configureaza
- se activeaza functia Return type
- daca se doreste a fi obligatoriu de selectat se bifeaza Required
- se completeaza sub forma de lista metodele oferite
Traducerea textelor
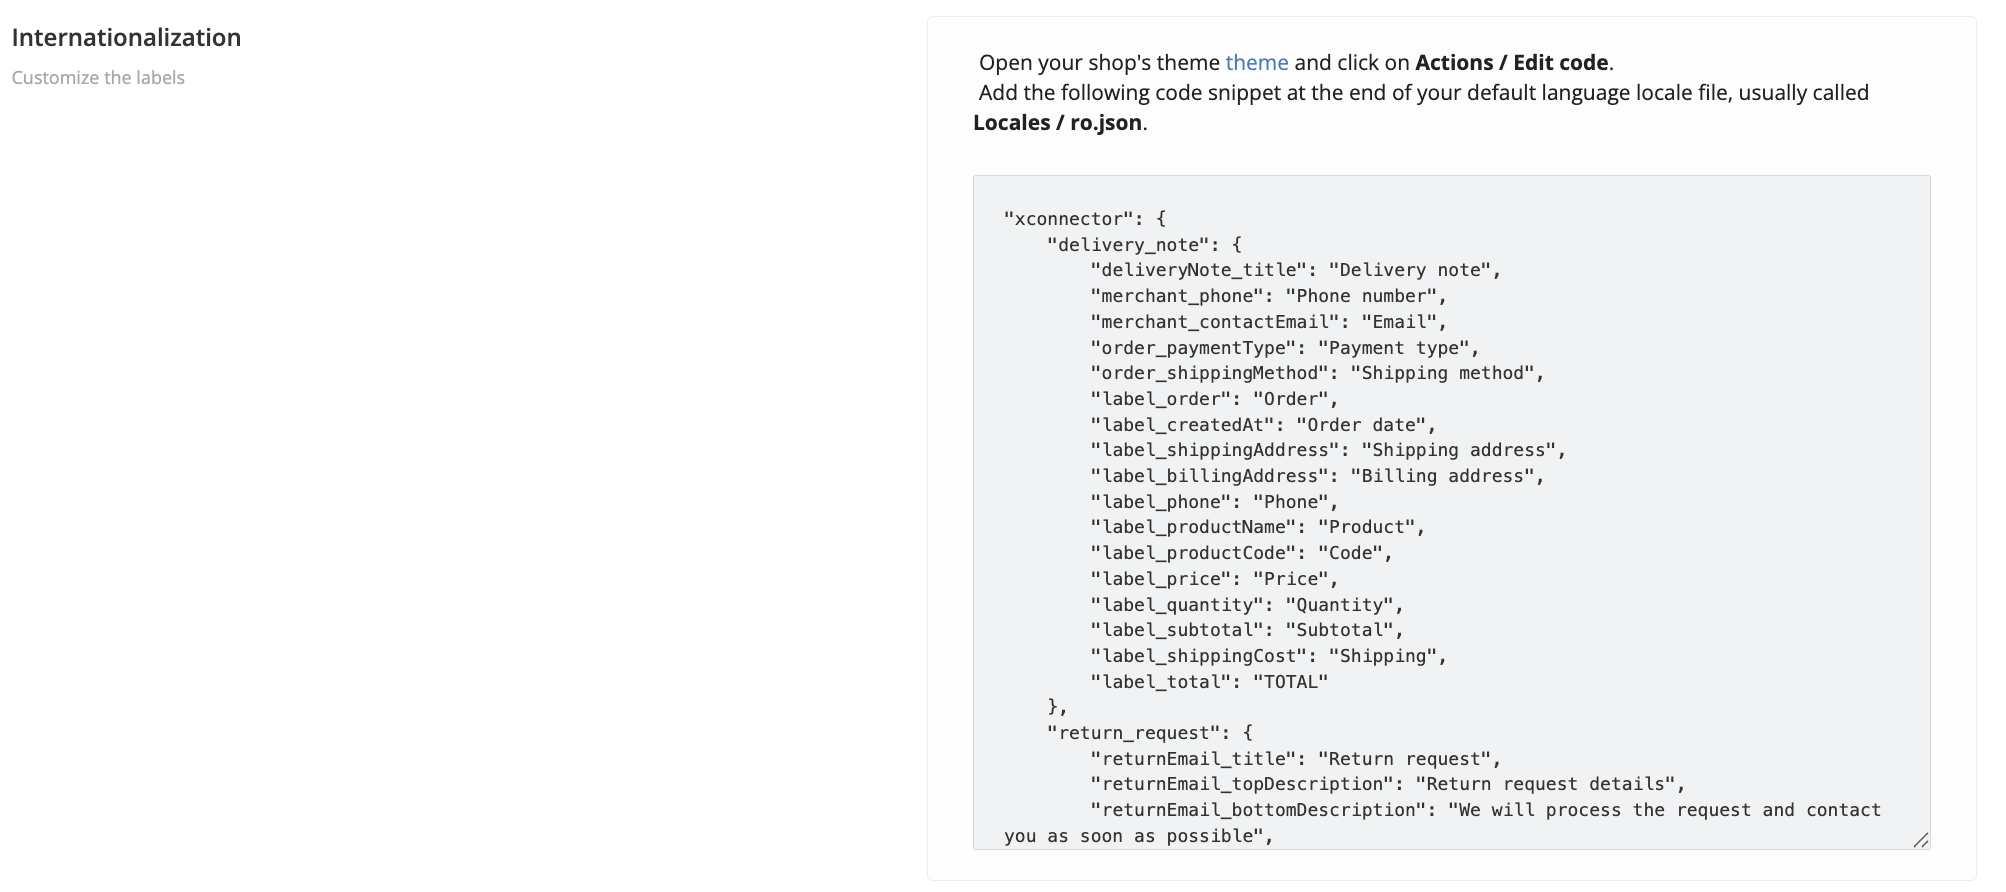
- Acceseaza xConnector - Profile -Tools - Internalization
- Copiaza codul
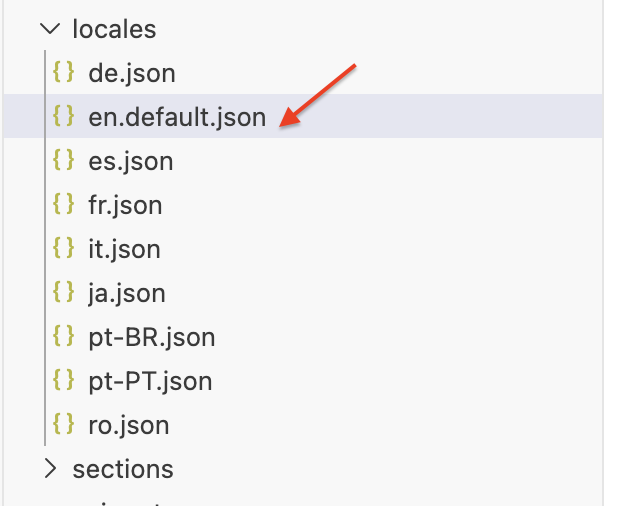
- Deschide tema magazinului tau si apasa pe Actions / Edit code.
- Adauga urmatorul fragment de cod la finalul fisierului de localizare pentru limba implicita, de obicei numit Locales / ro.json - fisierul default
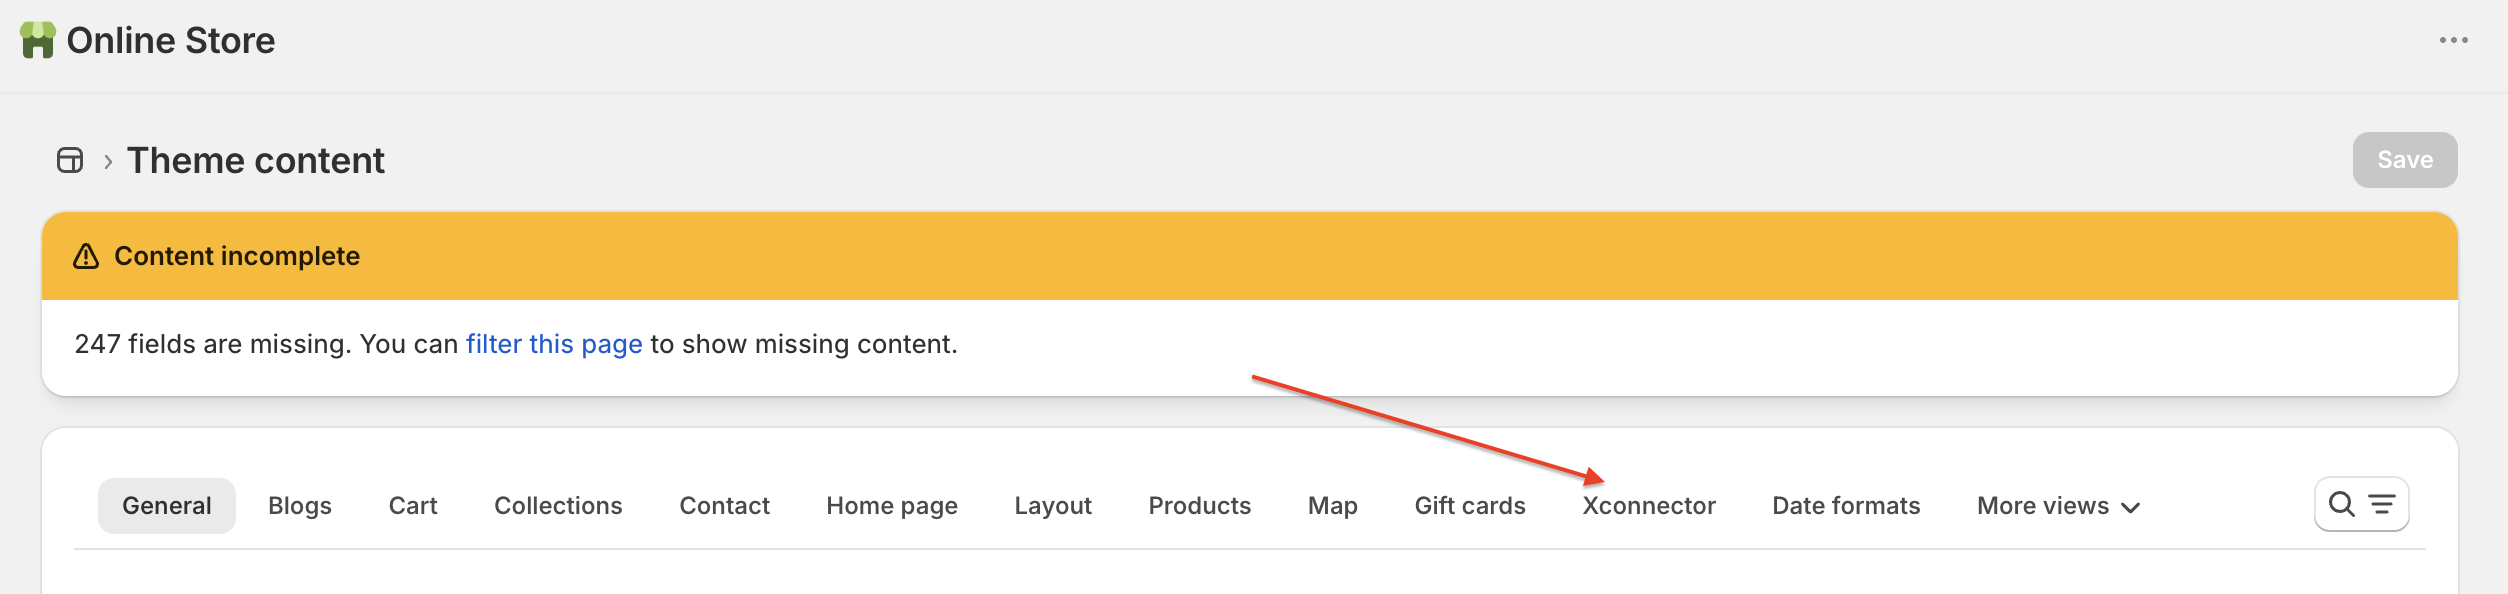
- Tradu etichetele: Variabilele xConnector se traduc din Shopify, accesand Shopify Admin > Sales channels > Online Store > click pe meniul ... > Edit default theme content > cautati sectiunea xConnector, modificati textele dorite si salvati.
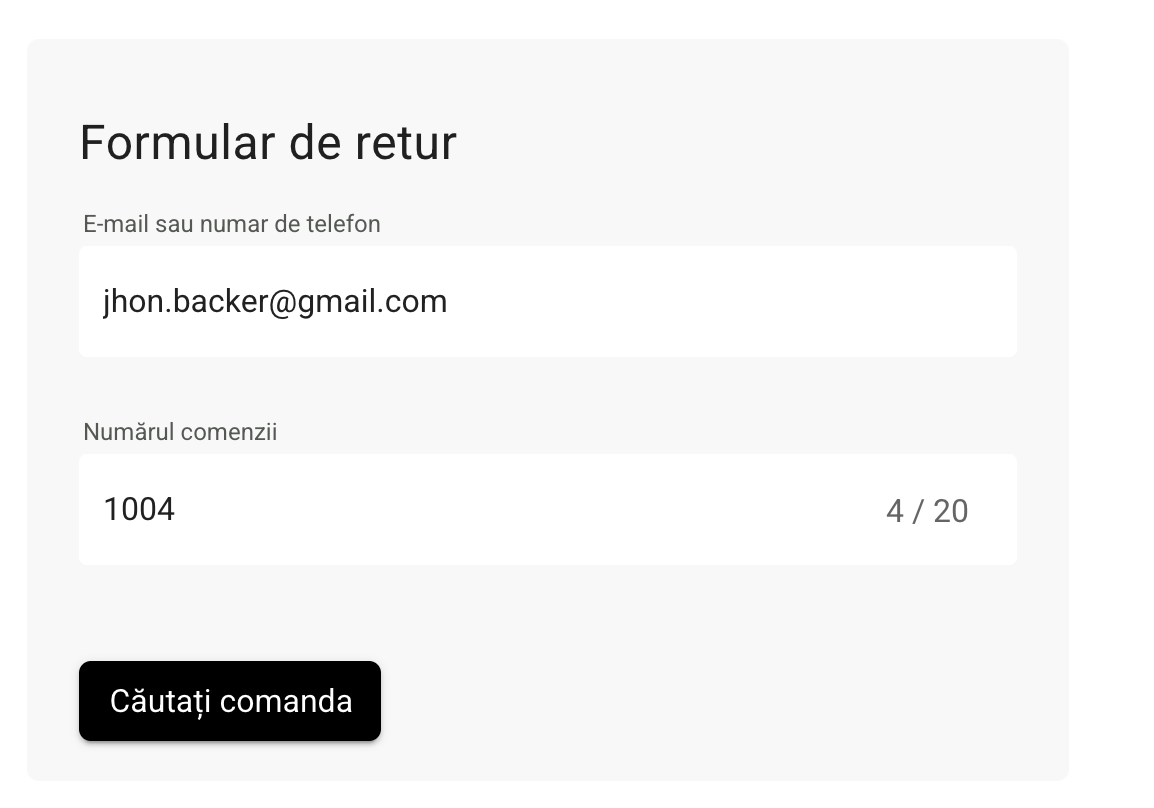
Plasarea unei cereri de retur
Pas 1: Identificarea comenzii
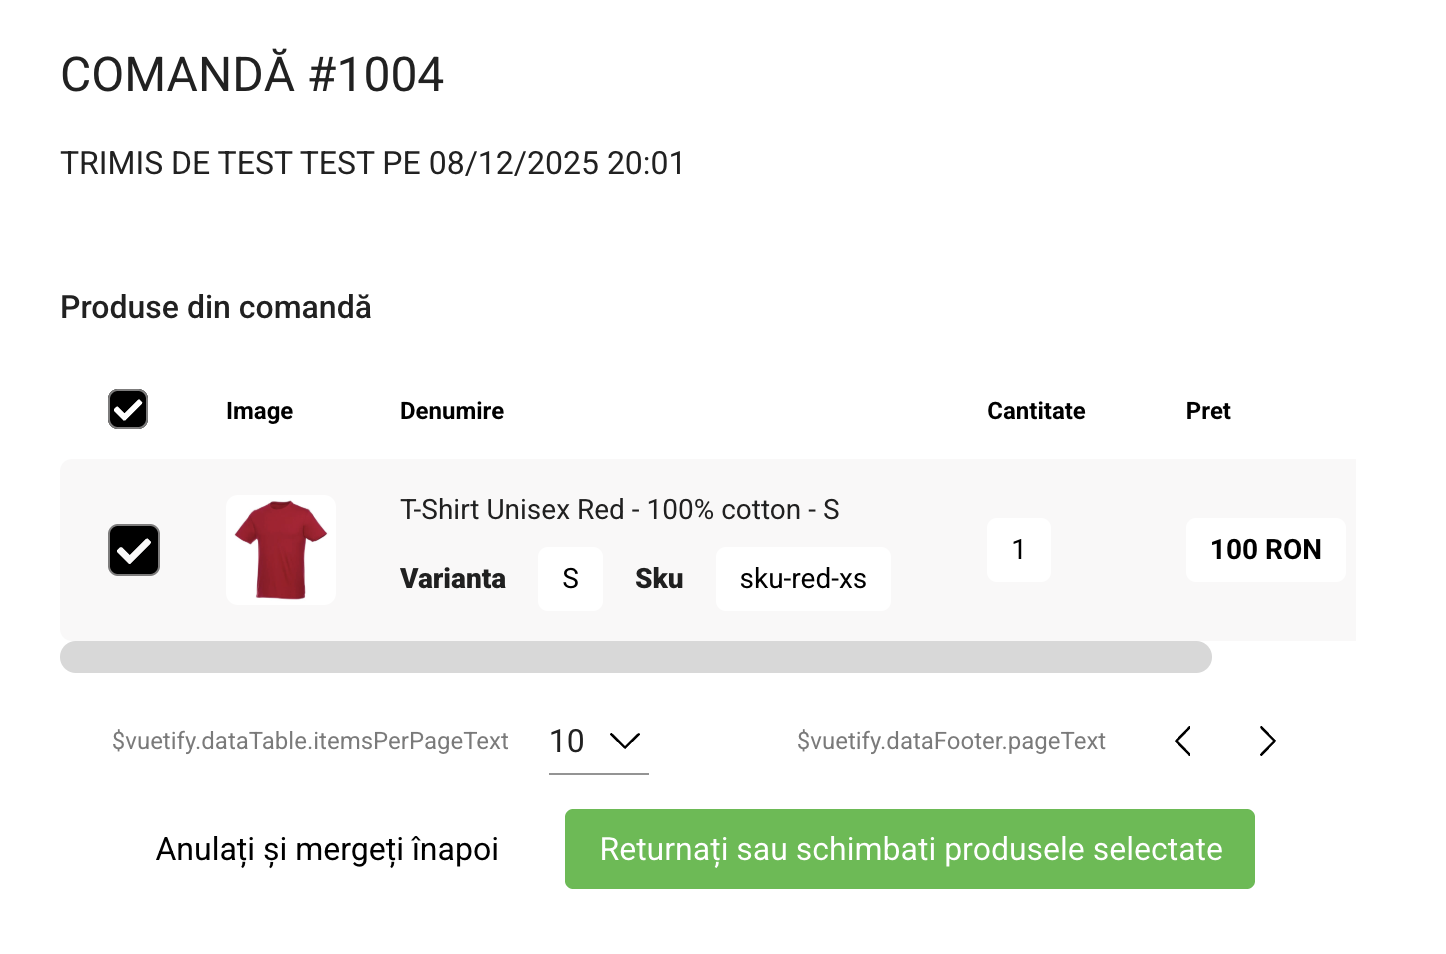
Pas 2: Selectarea produselor din comanda care se doresc a fi returnate/schimbate
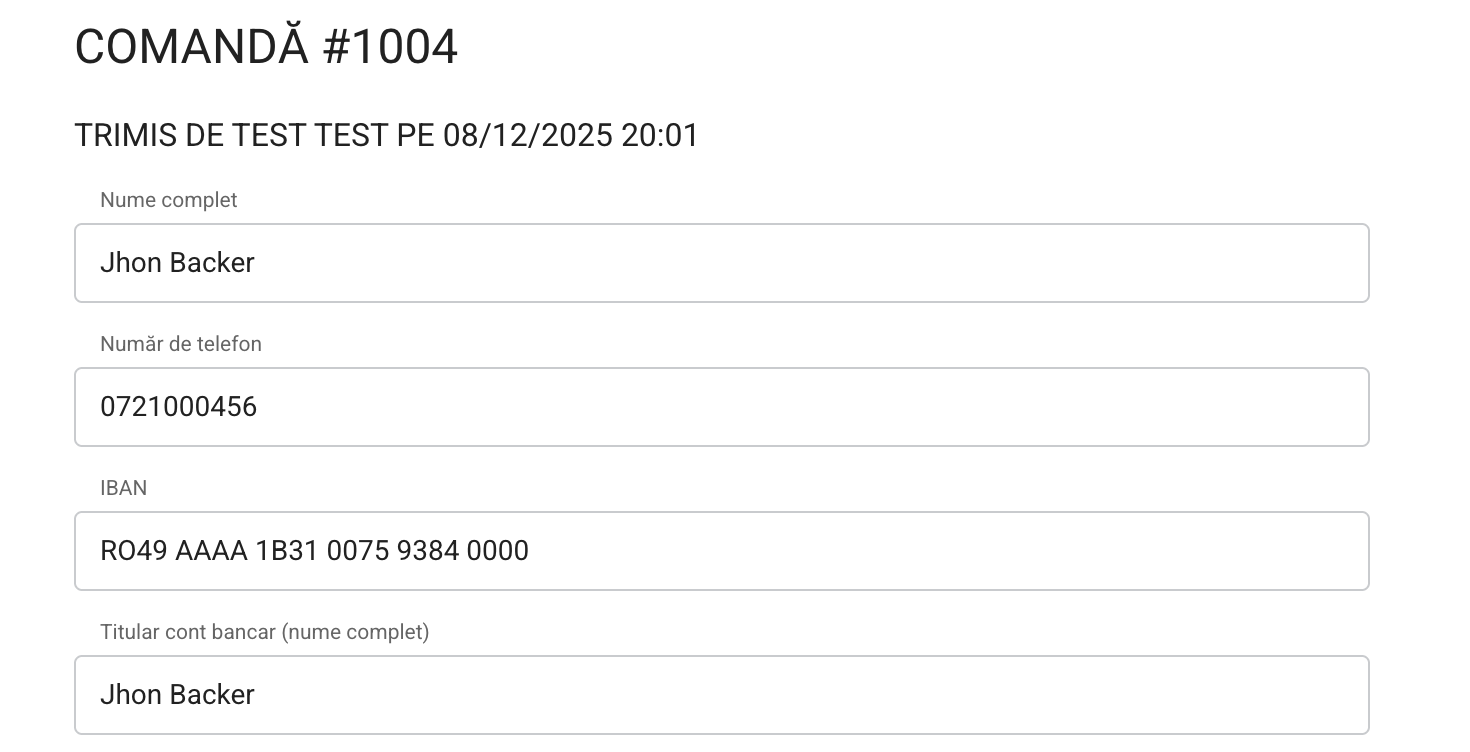
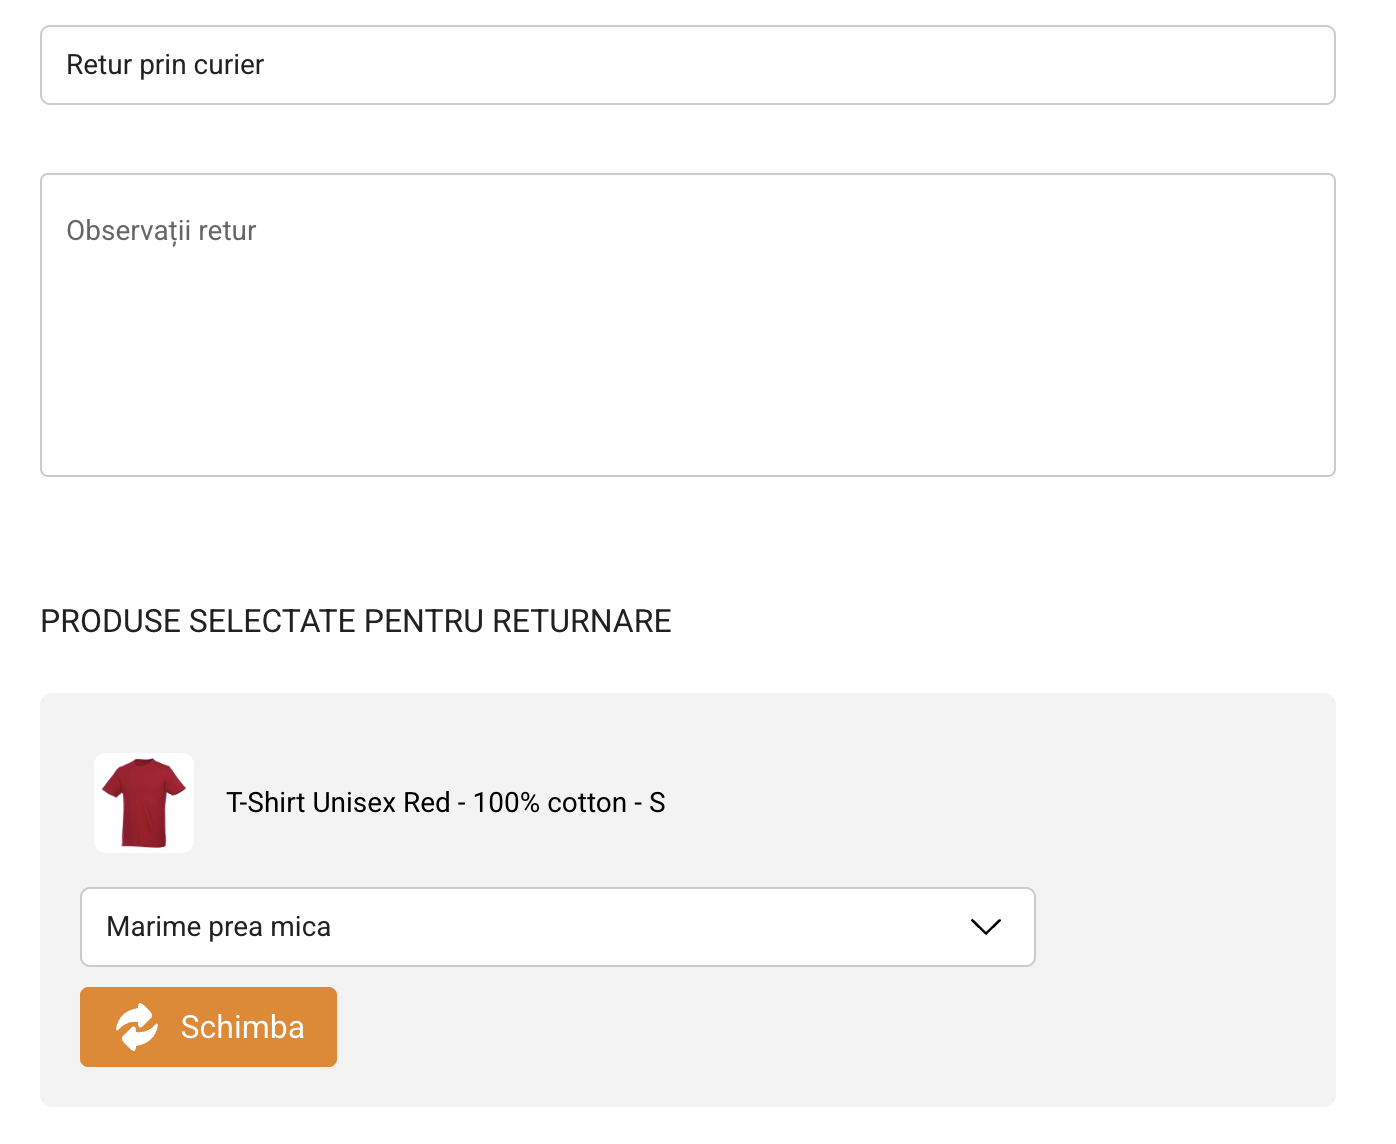
Pas 3: Completarea datelor necesare returului
Pas 4: Confirmarea cererii de retur (clientul primeste o notificare pe email dar si responsabilul de procesarea retururilor)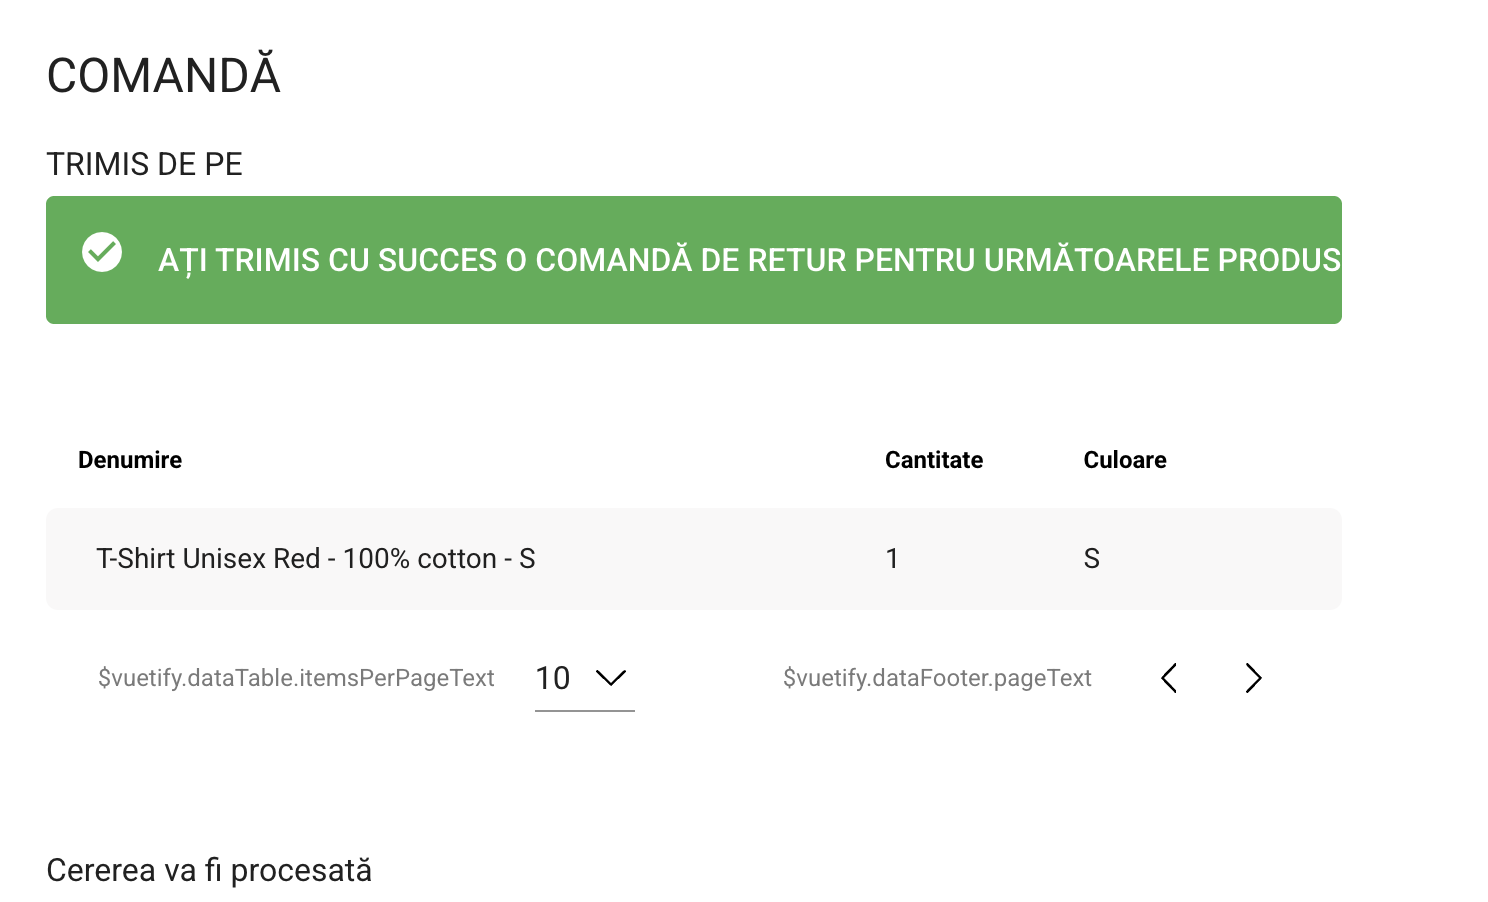
Exemplu confirmare primita de catre client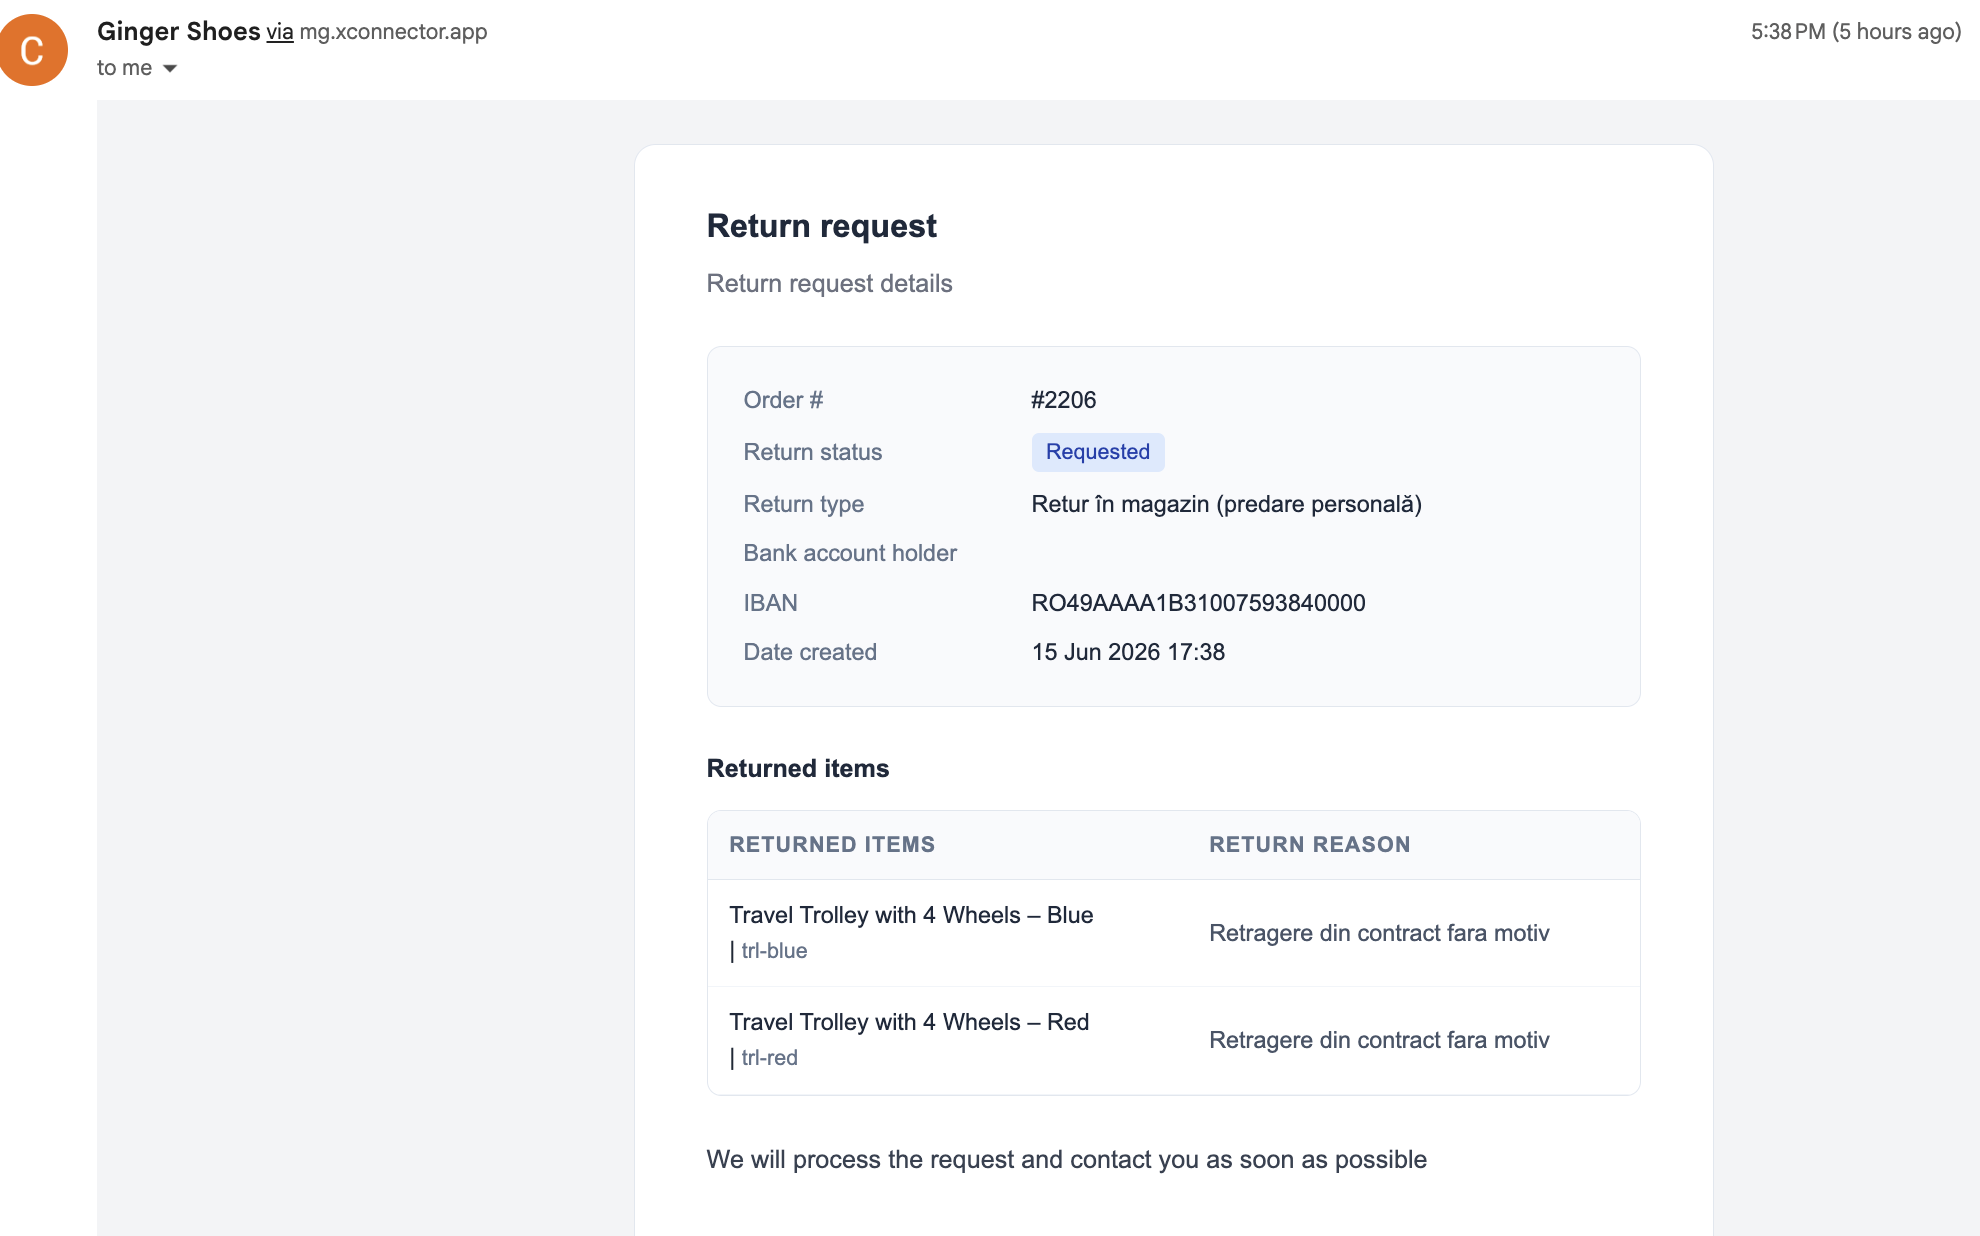
Procesarea cererilor de retur
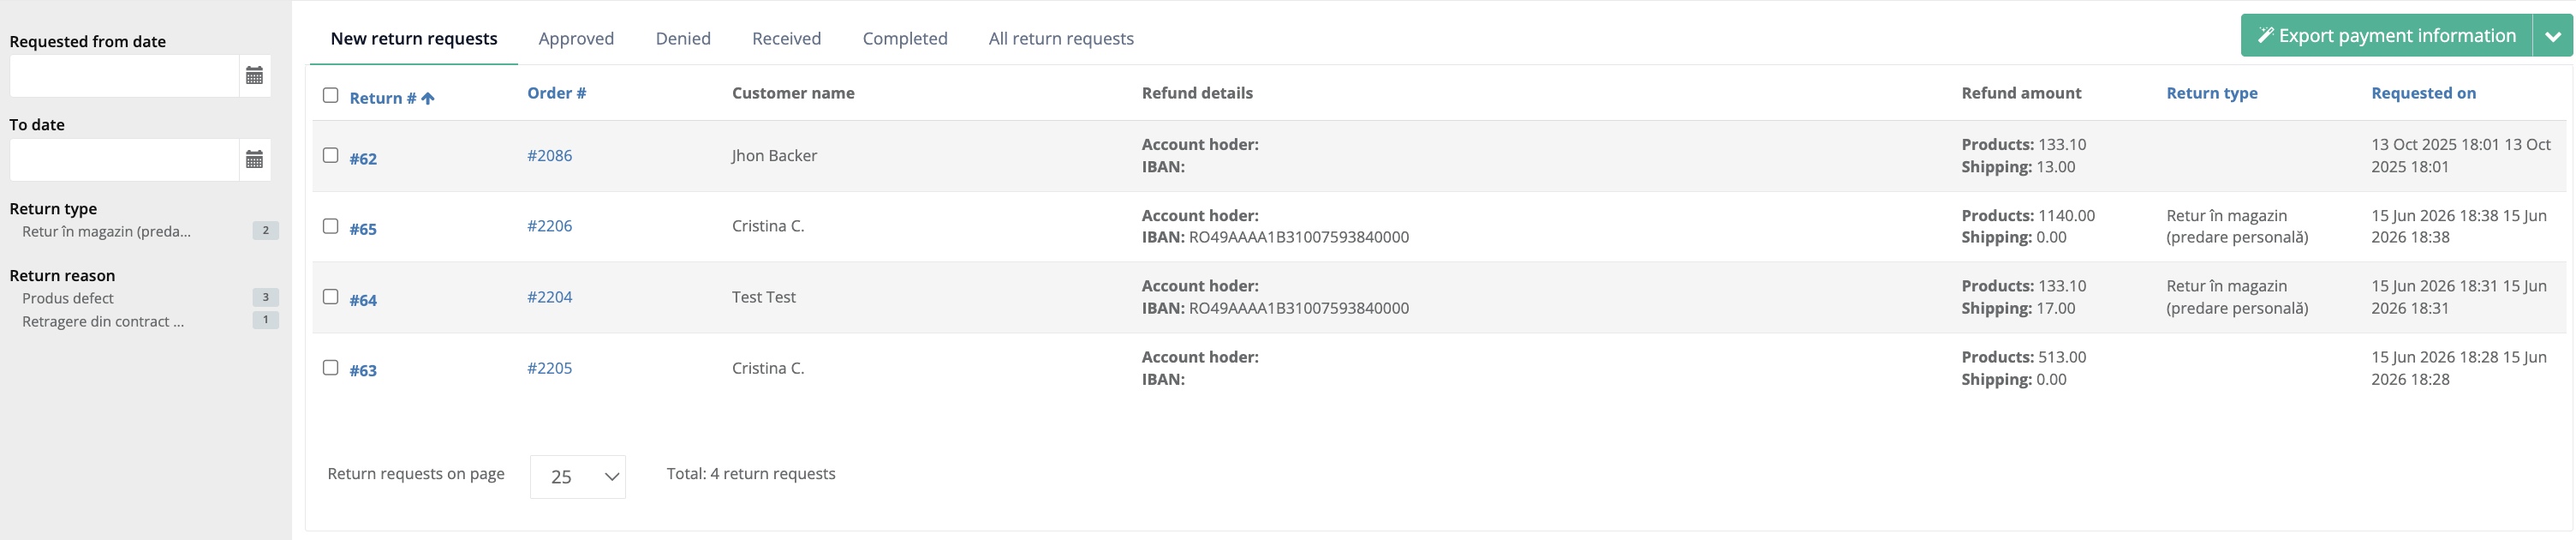
Pas 1: Acceseaza xConnector - Profile - Return request
Aici sunt afisate toate cererile de retur primite de pe site.
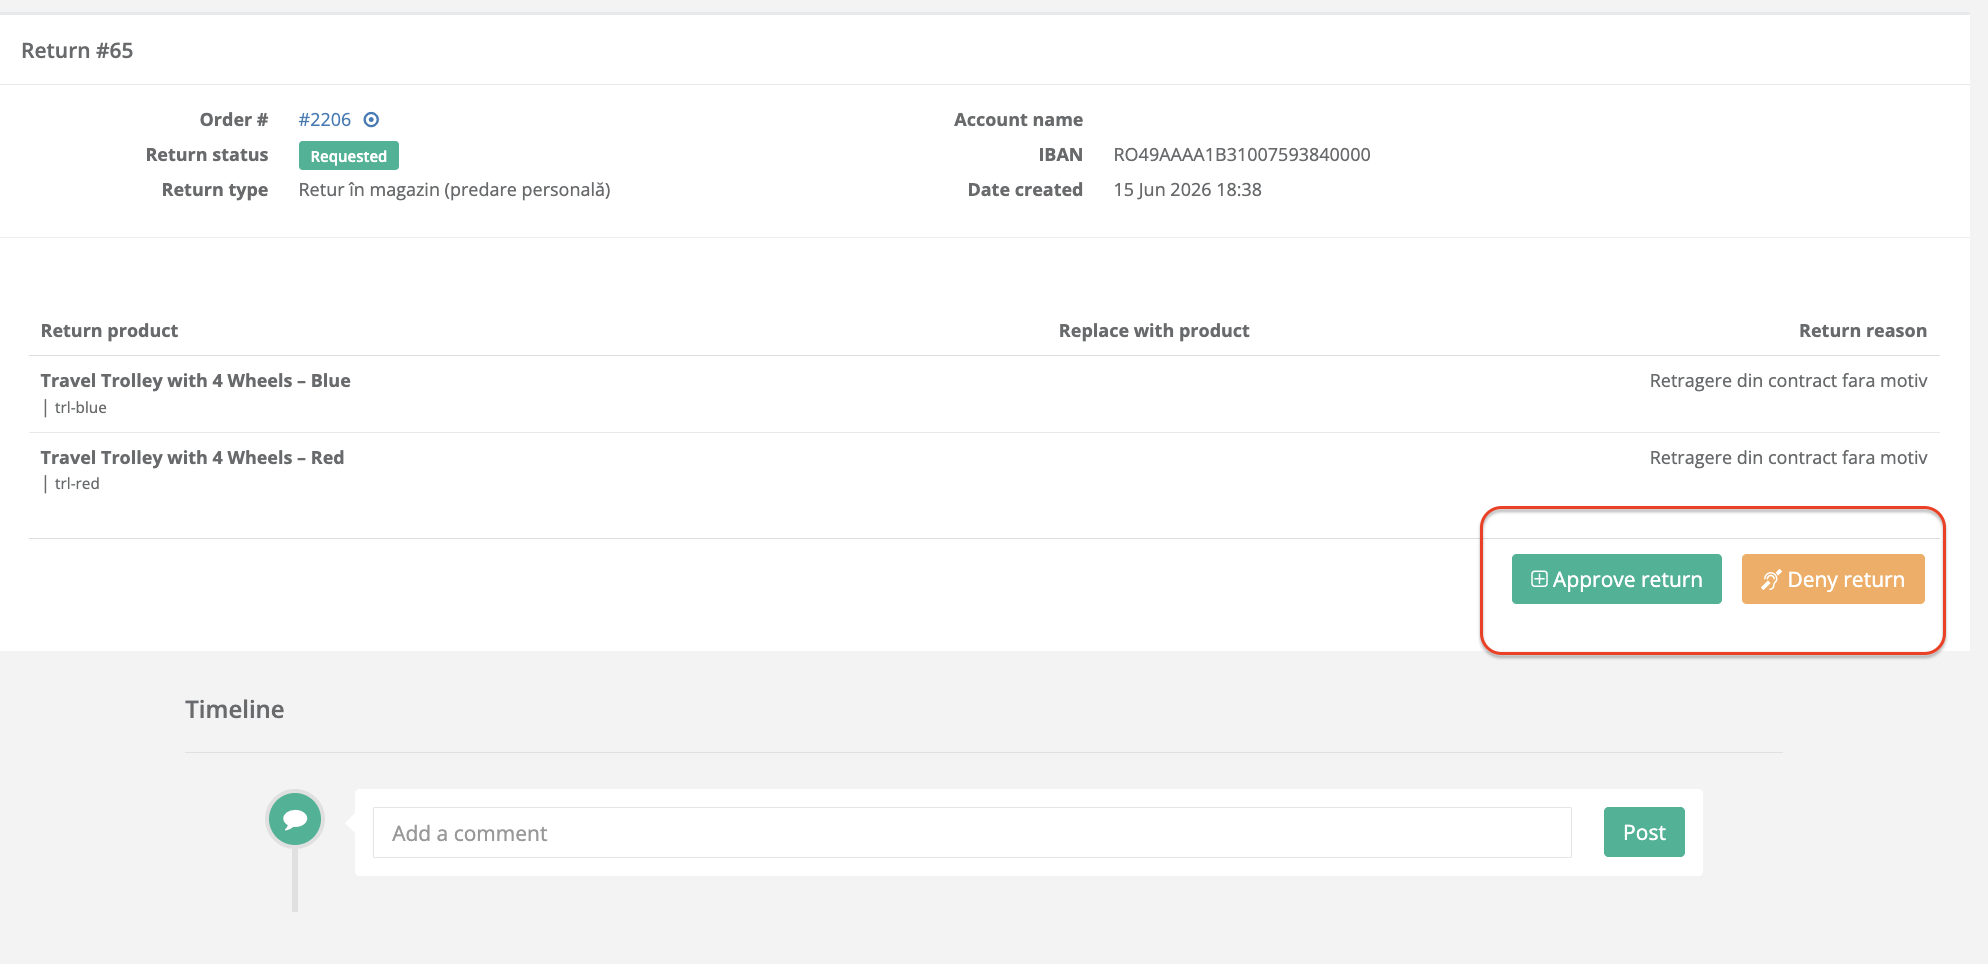
Ca sa aprobi sau sa respingi o cerere de retur, apasa pe numarul de retur, acceseaza pagina cu detalii retur iar aici ai cele doua optiuni.
Pas 2: Genereaza awb de retur
Dupa ce ai acceptat returul, se va activa optiunea de creare awb de retur.

How do I generate a return shipping label with drop-off in a locker?
Shipping label generation - Return the package to the locker point
When generating a shipping label for a pickup-from-locker order, you need to select the corresponding service type. Depending on each courier, you need to select the appropriate service type for delivery to a locker. In the first tab - Courier - Service tab field.
For example:
Courier Sameday - Service type Locker retur
Your customers can return the package to the locker - for the moment available only for Sameday courier.
You can generate a return shipping label to the locker by following the steps below:
- Access the order details (click on the order number) - the order details page will open.
- Click on the 'Create return shipment' button - the pop-up for generating the shipping label will open.

- Courier: depending on the courier, select the Service type needed for return at a locker. For example Sameday has the Service type: Locker Retur
- Pickup address: here is he default locker address, where the client received for the first time his package
- Content: no need to fillin
- Observation: check the option if needed
- Go through the steps to generate the shipping label, Save, and Print.
- you will find the access code to open a locker at the Timeline section (click on the order number - scroll down - Timeline)
- Give this code to your client, he will be able to open the locker and the courier will pick it and deliver to you.

Pas 3: Marcheaza cererea de retur ca Primita (Received)
Pas 4: Vireaza banii in cont si marcheaza cererea de retur ca Finalizata (Completed)
Rambursarea in cont bancar
https://xconnector.freshdesk.com/support/solutions/articles/103000384923-rambursul-in-cont-bancar-pentru-retururi
Se pot genera awb-uri de retur pentru urmatoarele servicii de curierat:
• DPD
• Cargus
• GLS
• MyGLS
• Sameday
• Innoship
• Posta Romana
• Speedy BG
• BRT Corriere
Return requests updates:
https://xconnector.freshdesk.com/support/solutions/articles/103000324508-update-13-12-2024
--------------------------------------------------------------------------------------------------
Dreptul de retragere — regula de bază
Consumatorul poate renunța la o cumpărătură online în 14 zile, fără să dea niciun motiv și fără penalități. De unde se numără cele 14 zile diferă:
- Produse: din ziua în care consumatorul (sau cineva desemnat de el) primește fizic produsul.
- Mai multe produse într-o comandă, livrate separat: din ziua primirii ultimului produs.
- Servicii / conținut digital pe abonament: din ziua încheierii contractului.
Dacă vânzătorul nu informeaza despre dreptul de retragere, termenul se prelungește cu până la 12 luni.
Caz 1 · Produsul NU a fost încă livrat
Clientul se retrage înainte de livrare
Clientul are dreptul să se retragă din momentul plasării comenzii, chiar dacă produsul nu a plecat sau e pe drum.
Mod de tratare:
- Se oprește expedierea dacă mai este posibil (anulare AWB / blocare comandă în WMS).
- Dacă produsul a plecat deja, clientul poate refuza coletul la livrare, iar acesta se recuperează ca retur.
- Rambursare integrală, inclusiv livrarea standard, în max. 14 zile.
Caz 2 · Produsul a fost livrat
Returul clasic după primire
Mod de tratare:
- Se înregistrează notificarea de retragere (clientul are 14 zile de la primire să o anunțe).
- Clientul are apoi încă 14 zile să trimită produsul înapoi.
- Costul returului îl suportă clientul — dar doar dacă a fost informat clar în prealabil (în politica de retur / la checkout). Dacă nu a fost informat, costul îl suportă comerciantul.
- La recepție se verifică starea produsului.
- Rambursarea se face în max. 14 zile de la notificare; poate fi amânată până la primirea produsului sau a dovezii de expediere.
Caz 3 · Comandă cu mai multe produse
Retragere parțială / livrări separate
- Dacă produsele au fost livrate separat, termenul de 14 zile curge de la primirea ultimului produs.
- Clientul trebuie să poată să se retragă doar pentru o parte din produse (retragere parțială), atât în formular, cât și prin butonul de retragere.
- Rambursarea se face proporțional pentru produsele returnate + livrarea aferentă conform regulilor.
Caz 4 · Servicii
Retragere dintr-un contract de servicii
- Clientul se poate retrage în 14 zile de la încheierea contractului.
- Dacă a cerut expres începerea imediată a serviciului și acesta a fost prestat parțial, clientul plătește proporțional pentru partea executată până la retragere; restul se rambursează
- De verificat literea de lege care precizeaza si de mentionat in Termeni si conditii
Caz 5 · Conținut & servicii digitale
Descărcabile, streaming, software, jocuri
- Dreptul de retragere se pierde doar dacă clientul a fost de acord expres cu începerea imediată a livrării și a confirmat că înțelege că pierde dreptul de retragere.
- De verificat literea de lege care precizeaza si de mentionat in Termeni si conditii
Caz 6 · Produse exceptate
Fără drept de retragere (de regulă)
Aceste produse se marchează clar și se exclud din butonul de retragere:
- Produse personalizate / făcute la comandă
- Produse perisabile
- Produse sigilate desigilate din motive de igienă/sănătate (cosmetice, lenjerie)
- CD/DVD/software desfăcute
- Ziare/reviste (abonamentul rămâne returnabil)
- Cazare, transport, închiriere auto, catering pentru o dată fix
- De verificat literea de lege care precizeaza si de mentionat in Termeni si conditii
--------------------------------------------------------------------------------
This feature is available for the Advanced subscription plan
Contact
➡️ Need help with xConnector? We are just a message away:
Chat: click the blue chat icon (bottom-right)
E-mail: support@xconnector.app
Phone: +4 0373 747 991
➡️ Stay connected with xConnector:
Facebook group: https://www.facebook.com/groups/shopify.romania.xconnector
Facebook page: https://www.facebook.com/xConnectorApp
TikTok: https://www.tiktok.com/@xconnector.app
YouTube: https://www.youtube.com/@xconnector_app
Was this article helpful?
That’s Great!
Thank you for your feedback
Sorry! We couldn't be helpful
Thank you for your feedback
Feedback sent
We appreciate your effort and will try to fix the article