TABLE OF CONTENTS
Introduction
By integrating the xConnector locker module into Releasit checkout form, you can now offer customers a locker‑delivery option right at the Checkout form.
Customers simply enter the required details—including selecting their preferred locker—before finalising the order.
No Shopify Plus subscription is required — only active xConnector and Releasit subscriptions.Desktop view

Mobile view
Releasit simplifies cash payment for your customers by replacing the default Shopify checkout with a tailor-made Cash on Delivery(COD) order form.
You can install it here.
Shopify App Store
Attention!

You need to install version 2 of Releasit in order to install the locker module

xConnector settings
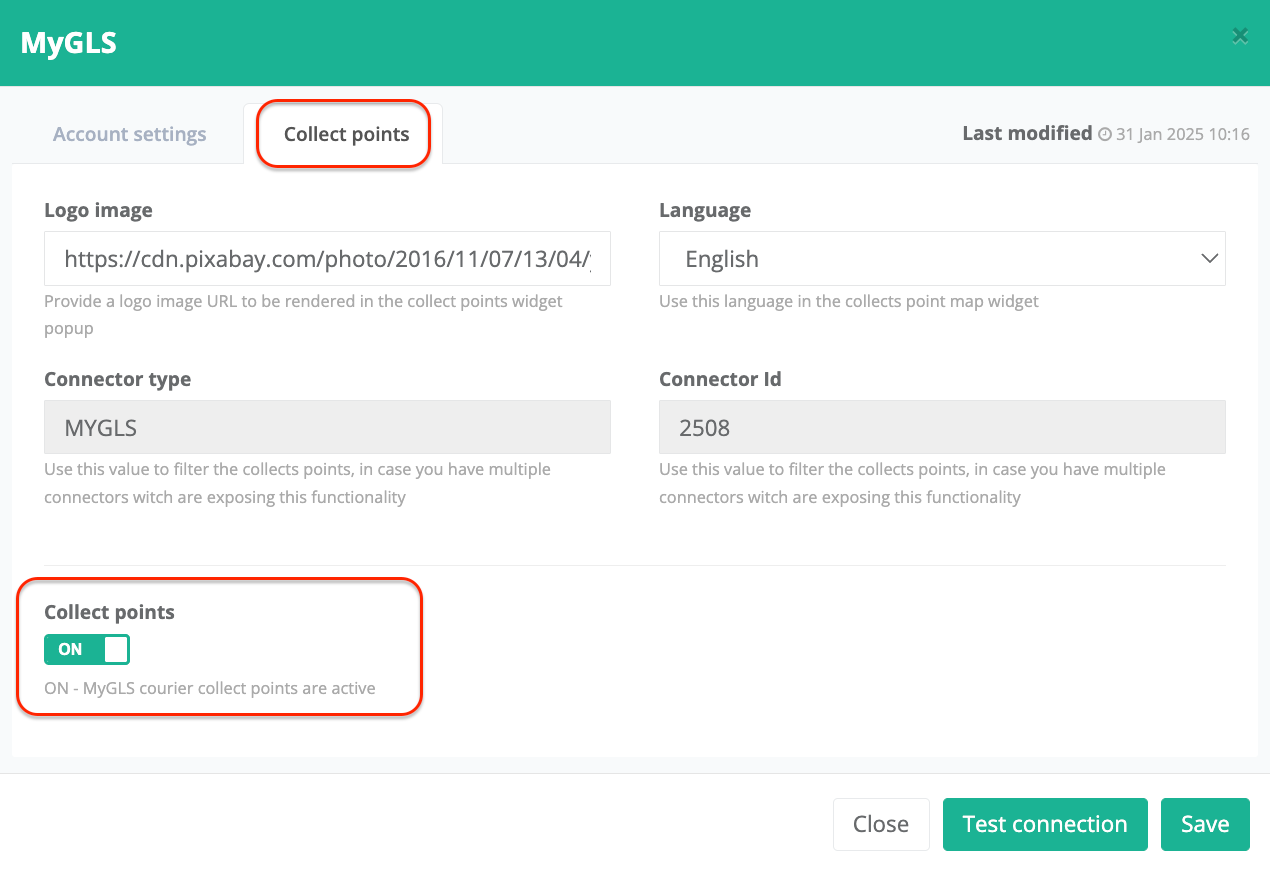
Activate the Lockers function for Your Courier(s)
Go to xConnector > Profile > Connected services > Courier > Collect points > Collect points: On > Save
Example:
Releasit settings
Here you can find the Releasit settings: https://help.releas.it/en/article/how-the-xconnector-x-releasit-integration-works-fw8b63/?bust=1767713982190
1. Access Form Design
- Start by opening your Releasit app dashboard.
- From the main menu, click on Form Design.
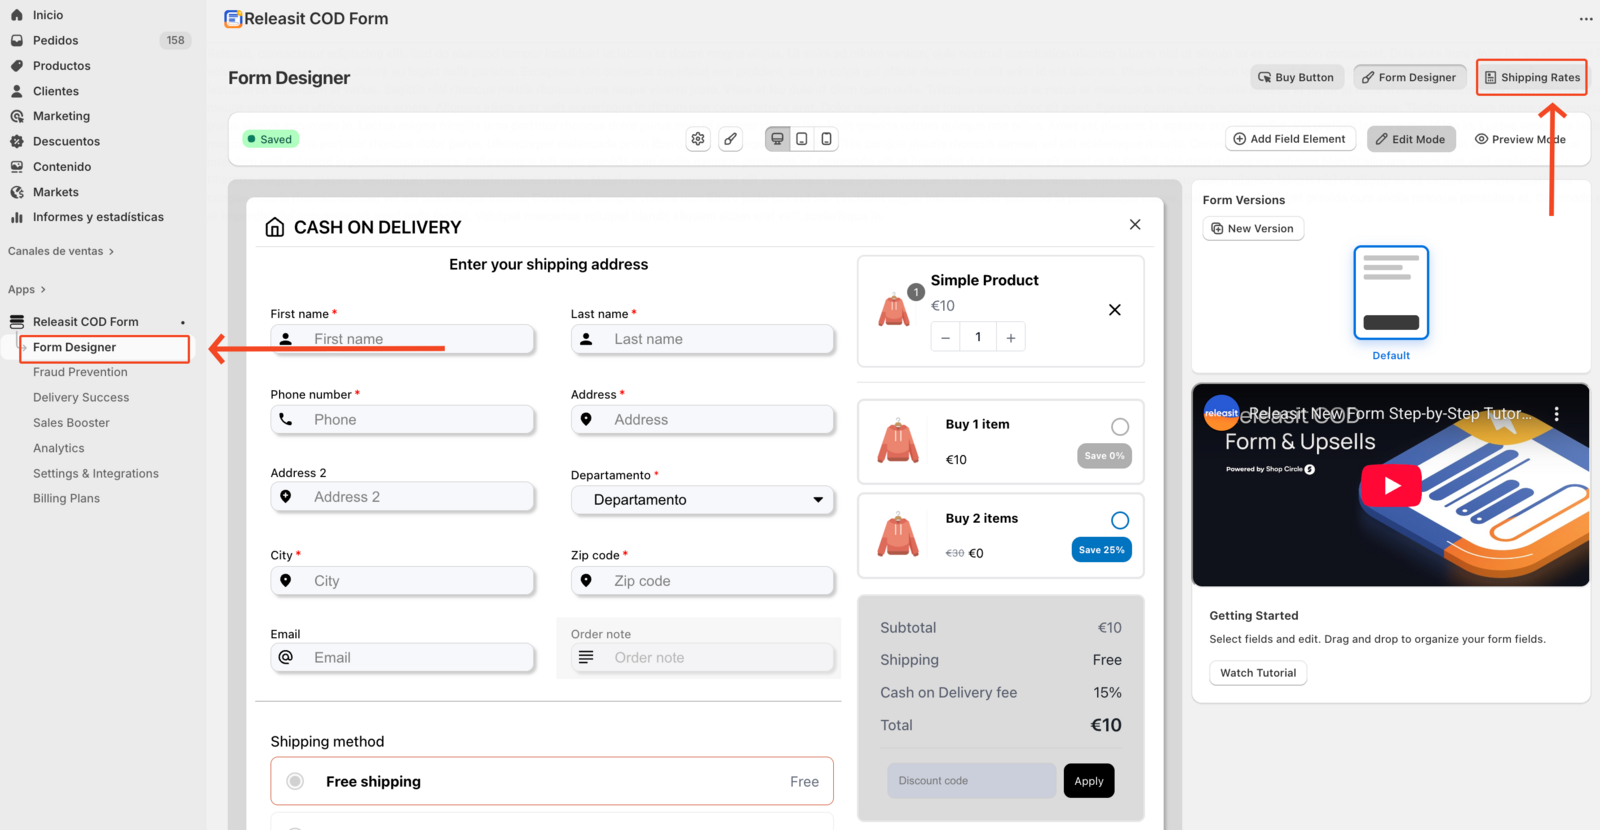
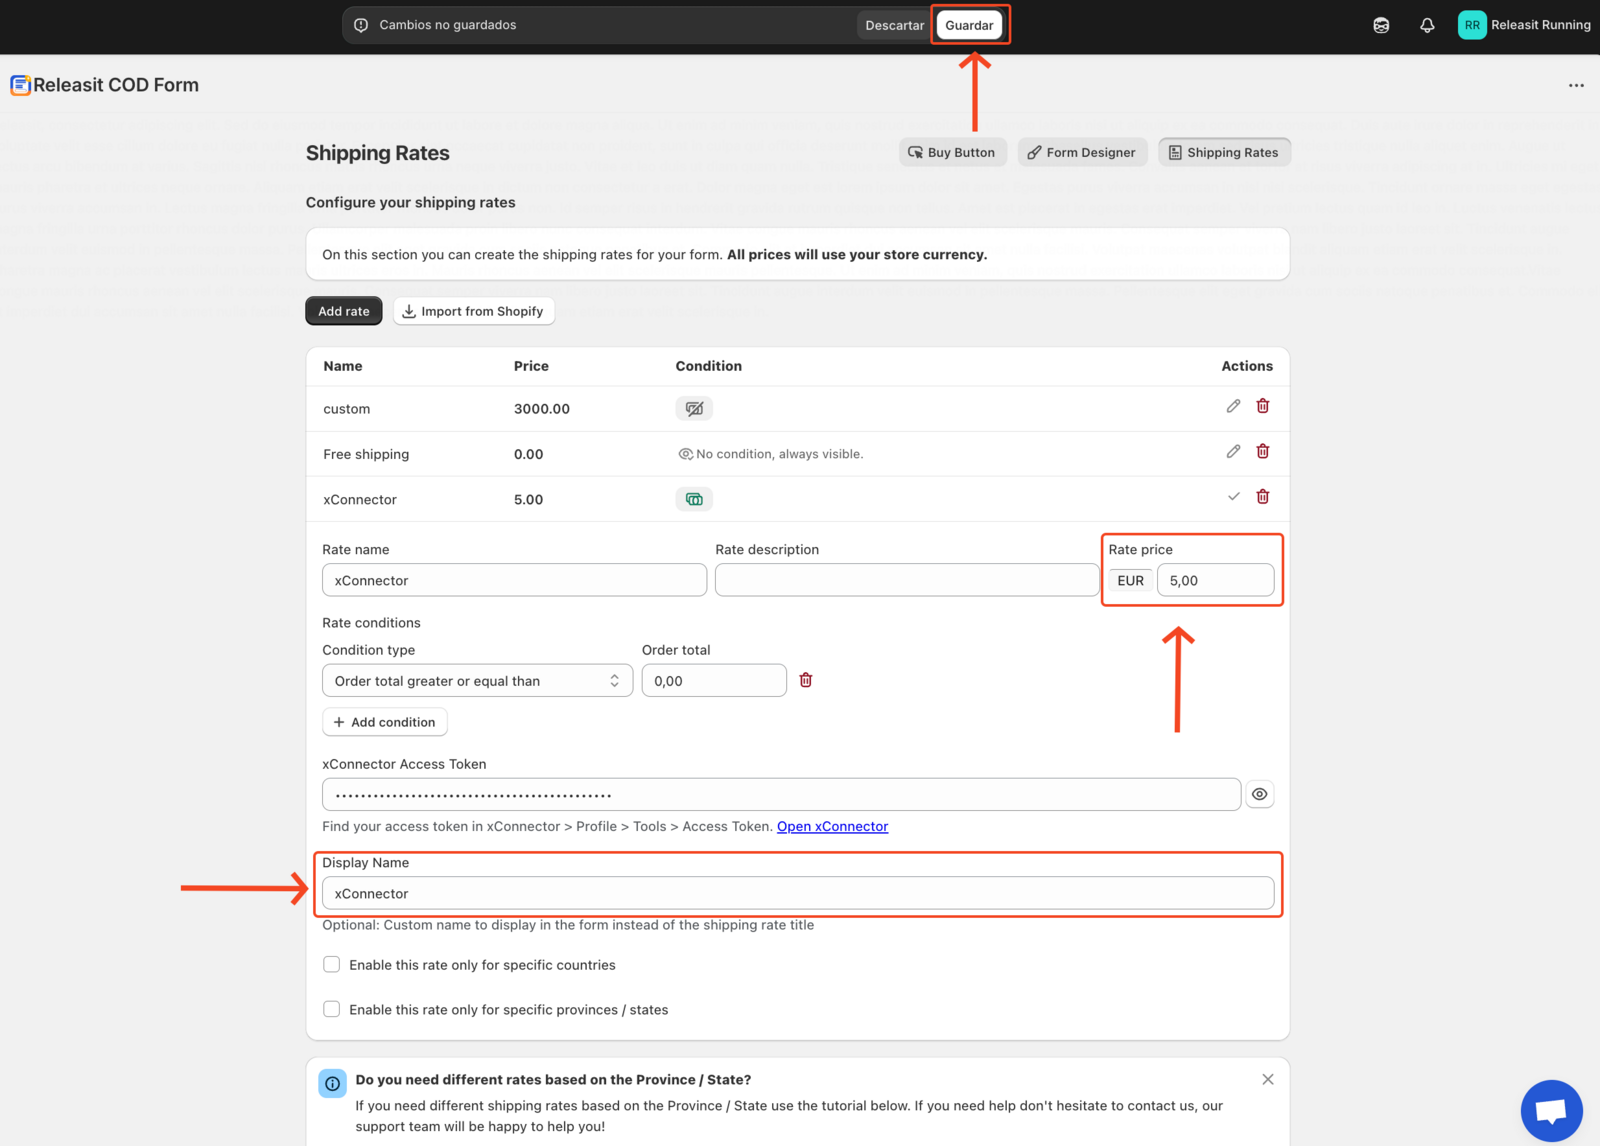
2. Create a new shipping rate
Inside the Form Design section:
- - Open Shipping Rates
- - Click Add Rate
- - The name of the new rate needs to be xConnector, or the access token field will not be shown
- This rate will represent the xConnector locker delivery option shown at checkout.
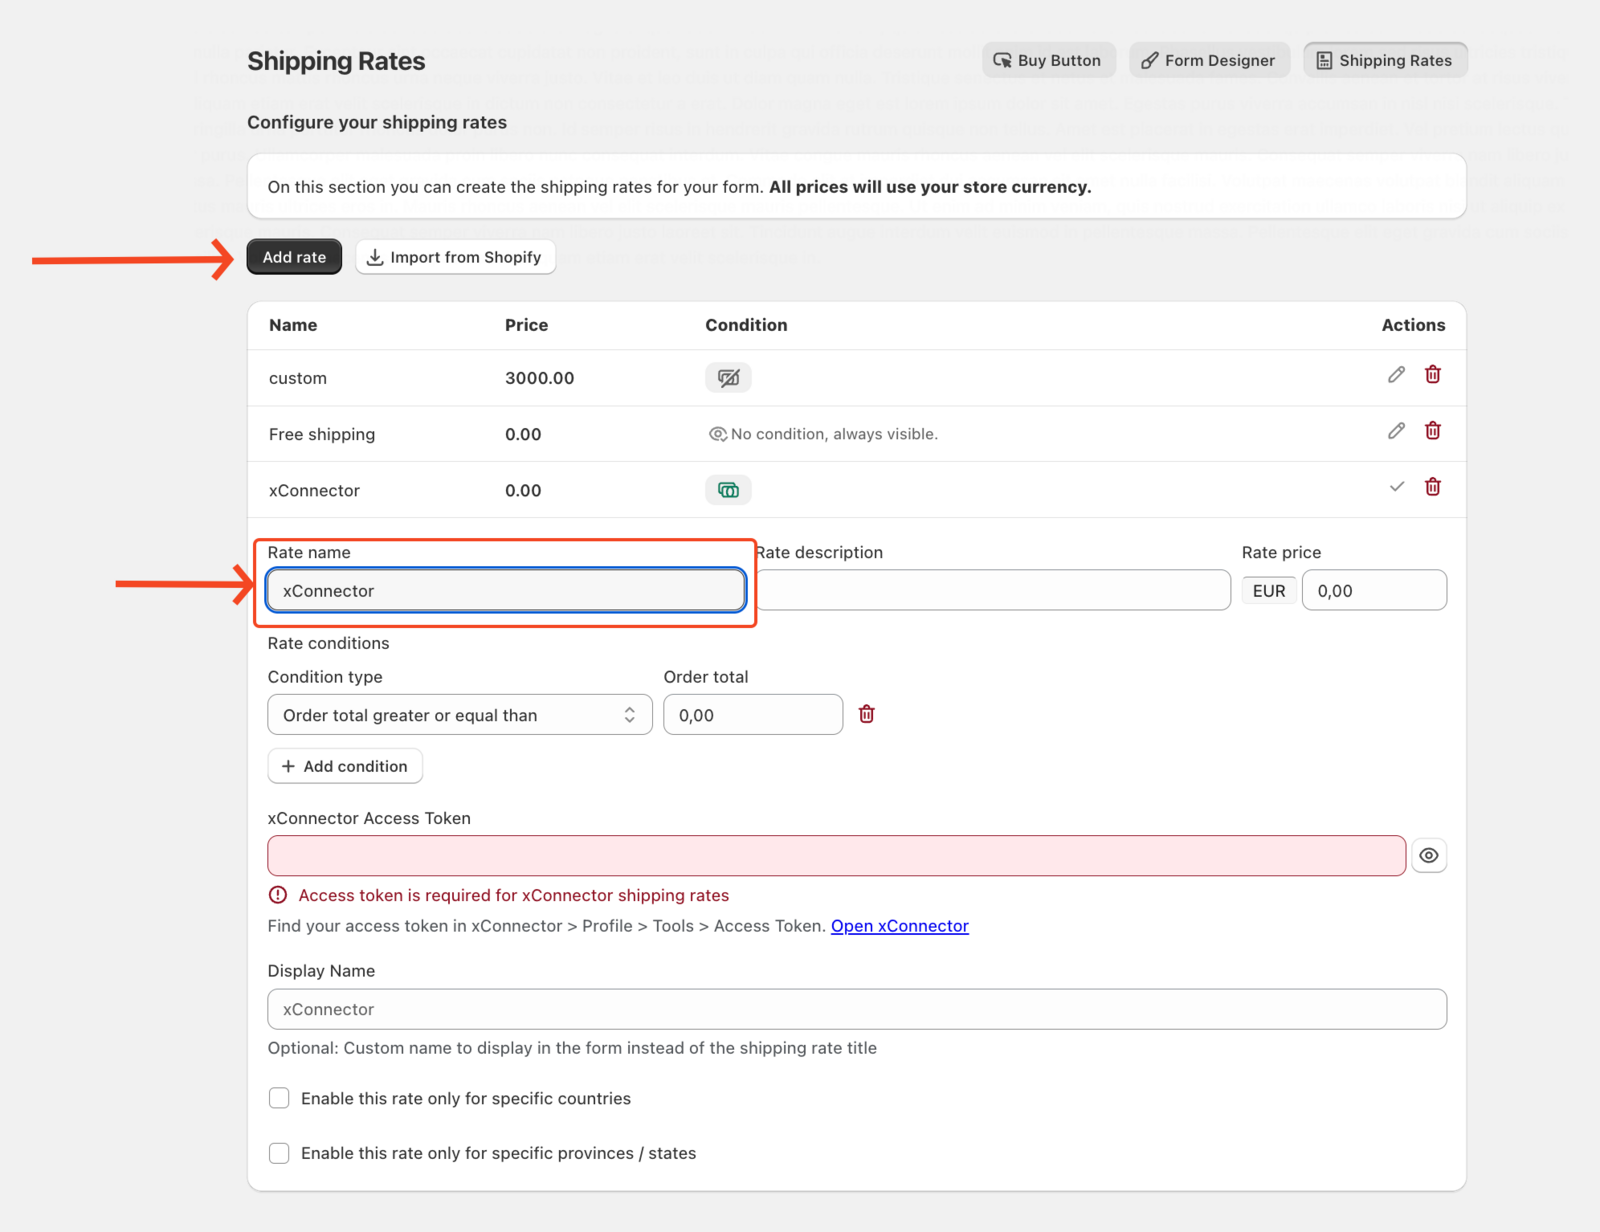
3. Add your xConnector access token
To enable the integration, you’ll need to add your xConnector access token.
You can find your token in the xConnector app.
- Go to your xConnector > Profile > Tools > Access token > Copy your access token
- Paste this token into the corresponding field in Releasit.

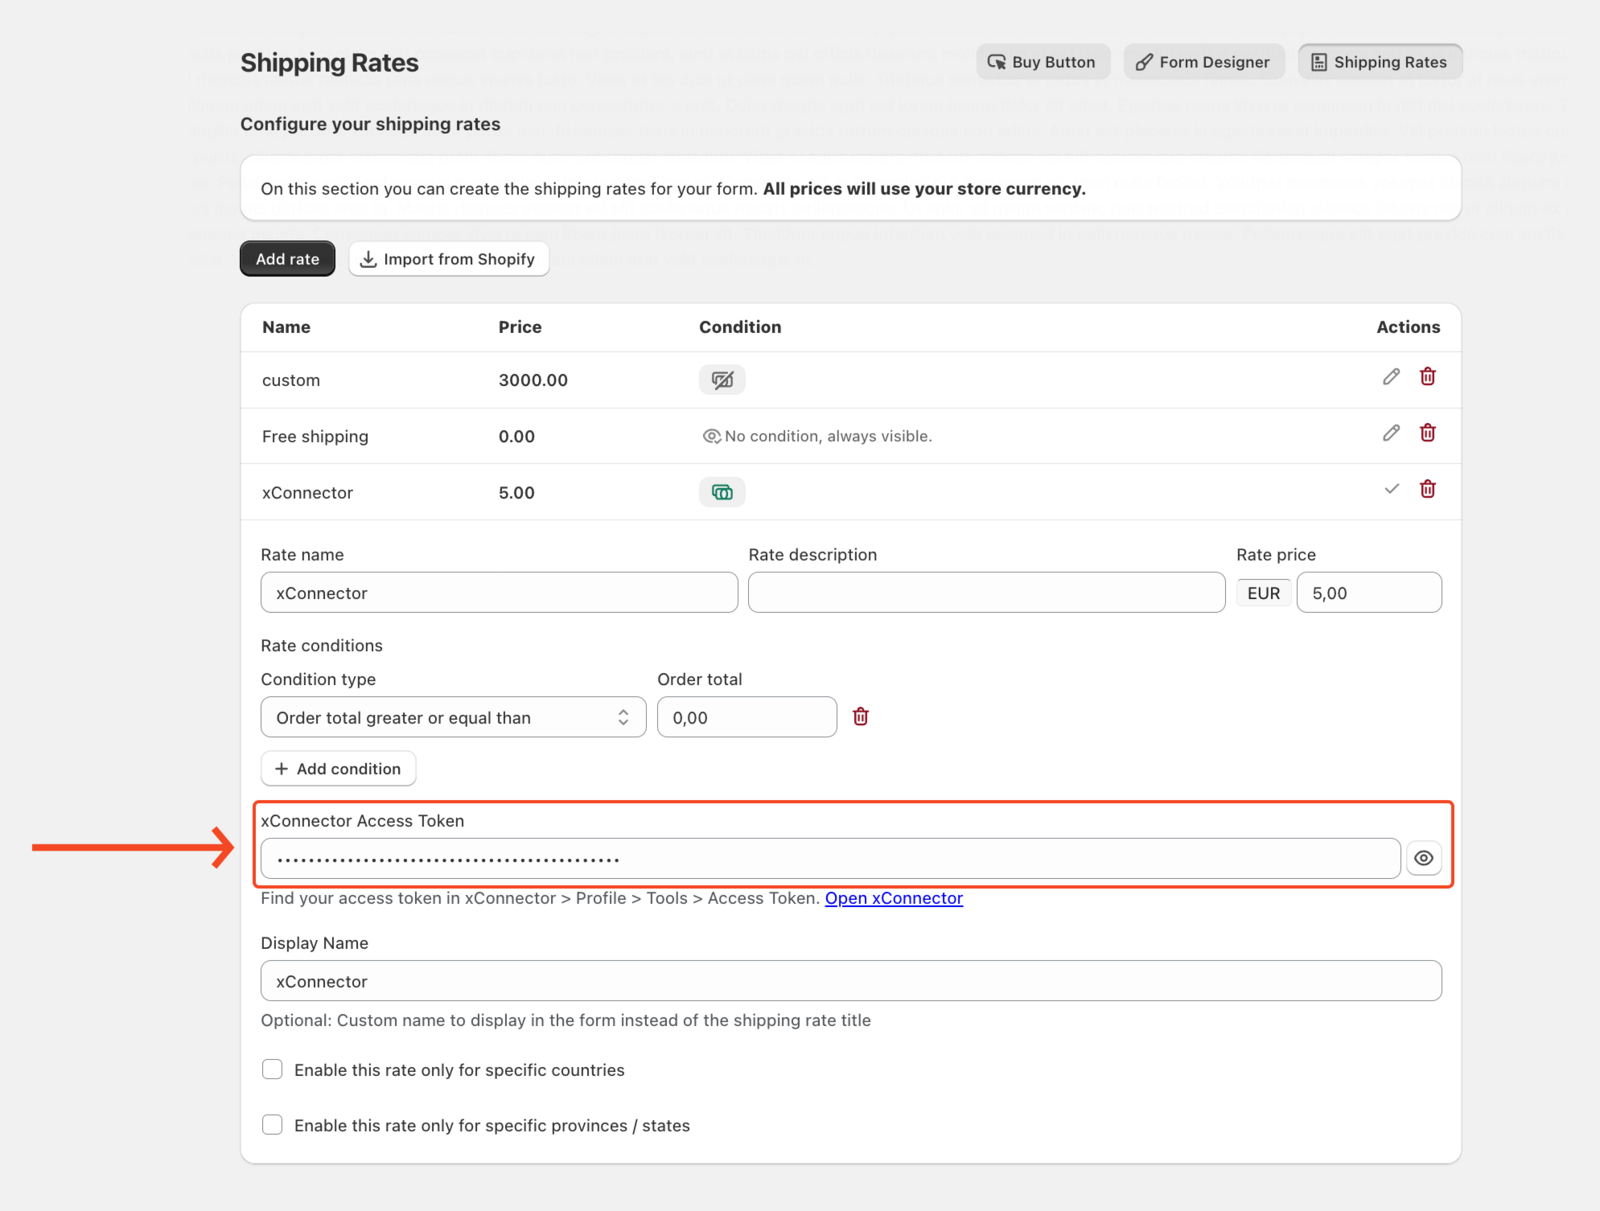
4. Customize and save the rate
Once the token is added, you can continue customizing your shipping rate based on your store’s needs.
Display name: this is the locker delivery name option shown at checkout.
When you’re done, click Save.
Your xConnector locker delivery option will now be active at checkout.
Shopify settings
After an order is placed, Shopify automatically displays the Order Status page to the customer.
If you also want the locker details to appear on the Order Status page, you can simply add the xConnector extension there.
This ensures that customers can easily view the selected locker information directly on the order confirmation page and update it if needed.

How to add the xConnector extension in Shopify - Order status?
Step 1: Go to Shopify > Settings > Checkout > Customize
Step 2: Select Order status

Step 3: Go to Apps

Step 4: Click on the plus sign to add the xConnector extension to Order status
 |  |
Step 5: Add the text xconnector (the same name as in Releasit - Rate Name)
Step 6: Save
This feature is available to Advanced plan
Feel free to contact us if you need any further information:
Chat: click on the blue chat icon (bottom-right)
E-mail: support@xconnector.app
Phone: +4 0373 747 991
Was this article helpful?
That’s Great!
Thank you for your feedback
Sorry! We couldn't be helpful
Thank you for your feedback
Feedback sent
We appreciate your effort and will try to fix the article