The MyGLS (RO, HU, CZ, SK, SI, HR) service is available for the following countries:
- Romania
- Hungary
- Czech Republic
- Slovakia
- Slovenia
- Croatia
⚠️ Attention: GLS Online service is no longer available.
Configuration
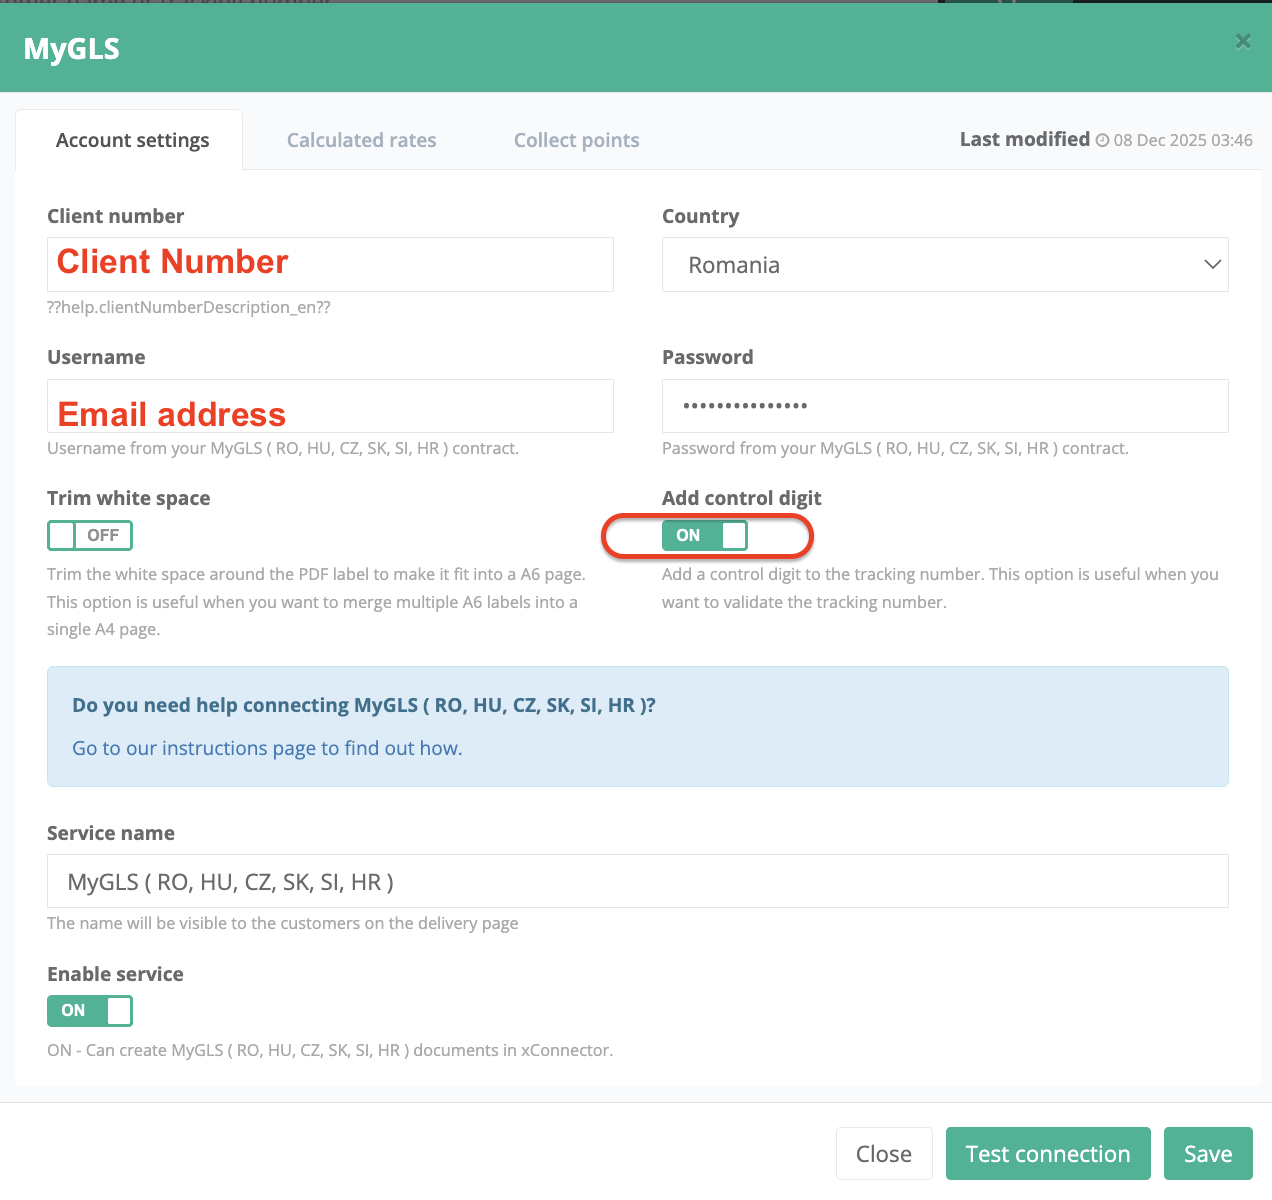
To connect the MyGLS service, go to xConnector → Profile → Connected Services → Connect a new service → Shipping labels → Connect a courier → MyGLS.
Access Credentials
Step 1
Fill in the values you normally use to log in to the MyGLS platform.
The following details are required to activate the MyGLS service:
- Client Number: Your GLS account number. You can check the number assigned to your account in the MyGLS platform.
- Username: The username you use to log in to the MyGLS platform.
- Password: The password you use to log in to the MyGLS platform.
Country – select the country specified in your contract with MyGLS.
Trim white space – set if OFF. You can set this option to ON only if the shipping label template is not printed as you expected.
Add control digit – set this option to ON to enable correlation between the shipping label number and the tracking number.
Step 2
Click on Test connection
Step 3
Save
Sender details on the shipping label
You can find the sender details used on the shipping label (AWB) here:
xConnector → Profile → Your Account → Fulfillment Location
These details are automatically imported from Shopify:
Shopify → Settings → Locations
If the information is not up to date in Shopify, you can update it there, and the changes will be automatically synced to xConnector.
Step 1: Shopify - Settings - Locations
Step 2: Fill in the data
Each location address must include the following details:
- street
- street number
- city
- county / state
- postal code
- phone number
Step 3: Close xConnector and reopen it from Shopify - Apps
Step 4: Check in xConnector whether the sender details are retrieved correctly.
xConnector - Profile - Your account - Default Fulfillment location
Shipping label generation
a. If the order is for home delivery, these are the required settings.
Home delivery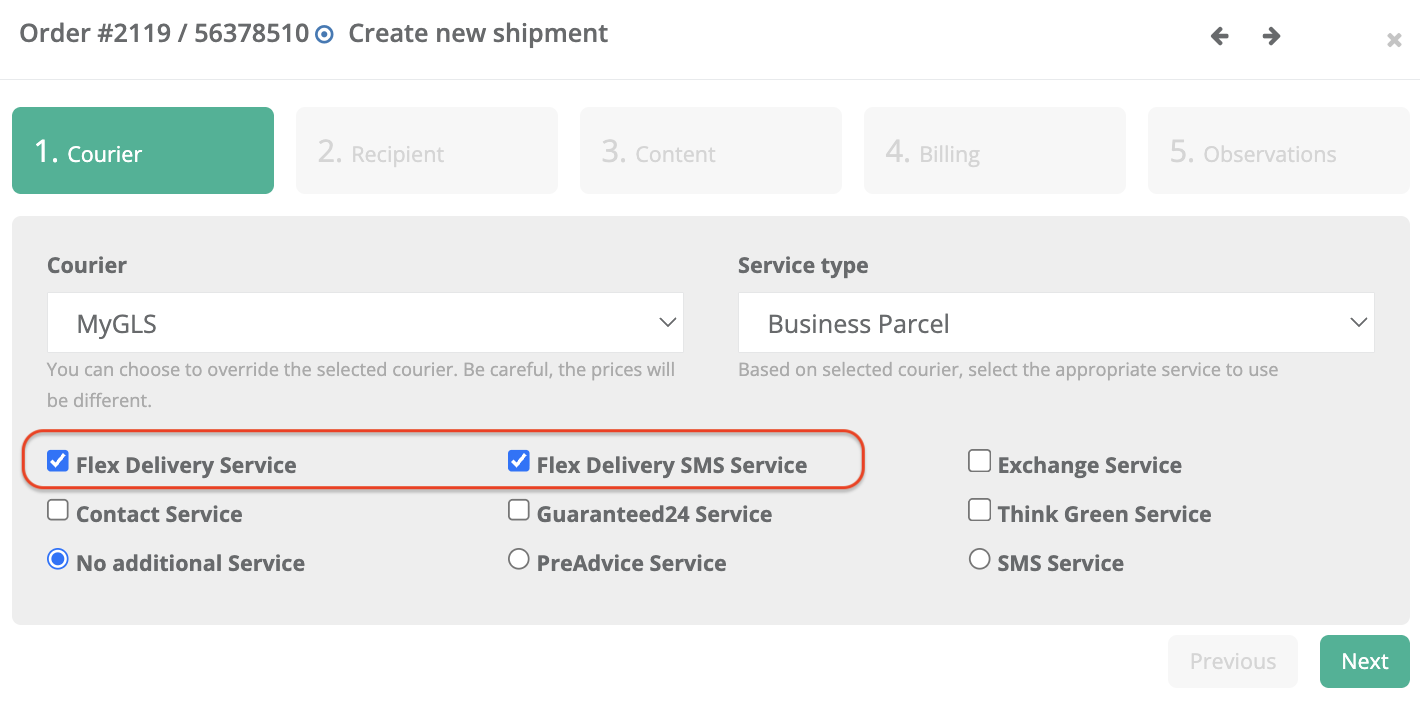
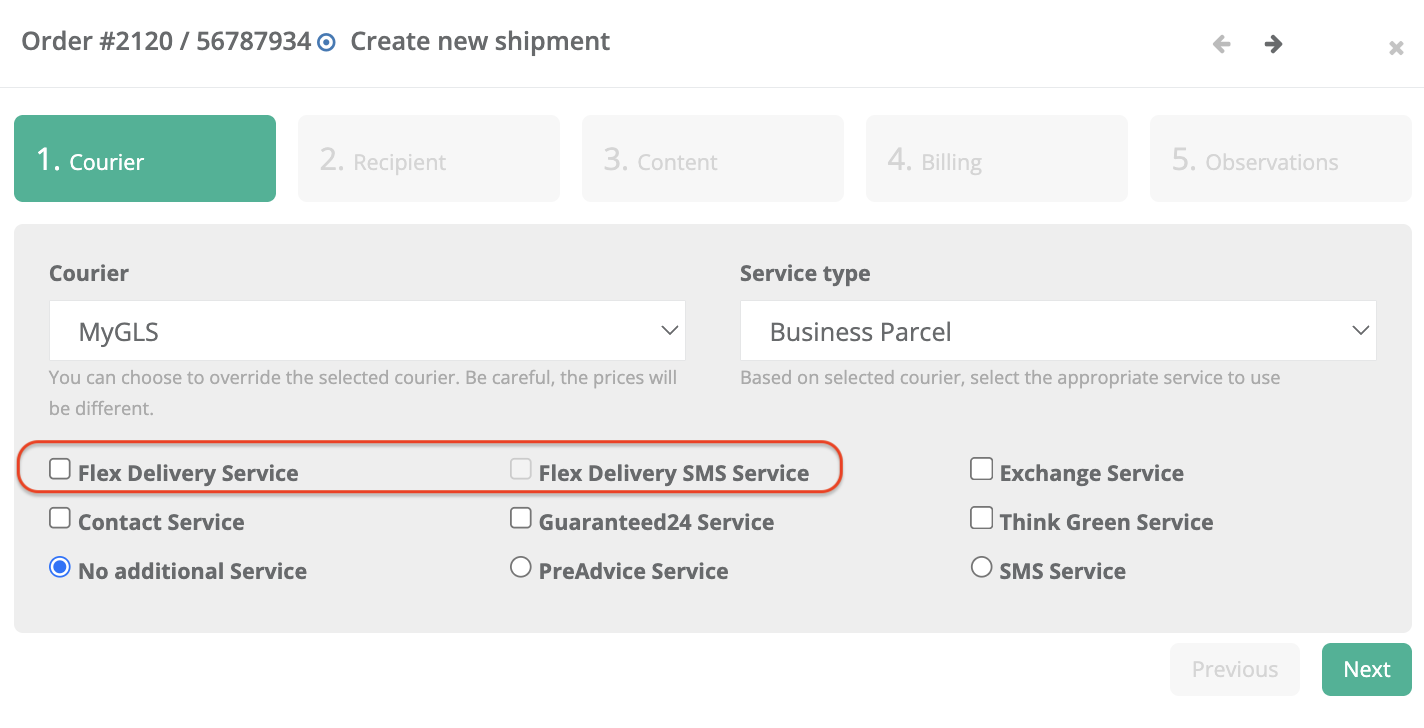
b. If the order is for locker delivery, these are the required settings.
Locker delivery
Locker map (Collect points)
The page where the locker map or locker list can be displayed depends on the active Shopify subscription. This is a limitation imposed by Shopify:
- Shopify Basic: the locker map and locker list can be installed on the Thank you page.
- Shopify Grow and Shopify Advanced: the locker list can be installed directly on the Checkout page.
- Shopify Plus: the locker map and locker list can be installed directly on the Checkout page.
- Custom checkout solutions, such as Releasit or EasySell: these do not depend on the Shopify subscription, and the locker map can be installed directly in the custom checkout.
This video presents the method for installing the locker map on the Thank you page.
MyGLS offers a Collect Points (lockers) service, allowing customers to select a MyGLS locker where they can pick up their order.
Please follow the required setup steps described here - V03 version:
https://xconnector.freshdesk.com/support/solutions/articles/103000015872-collect-points-lockers
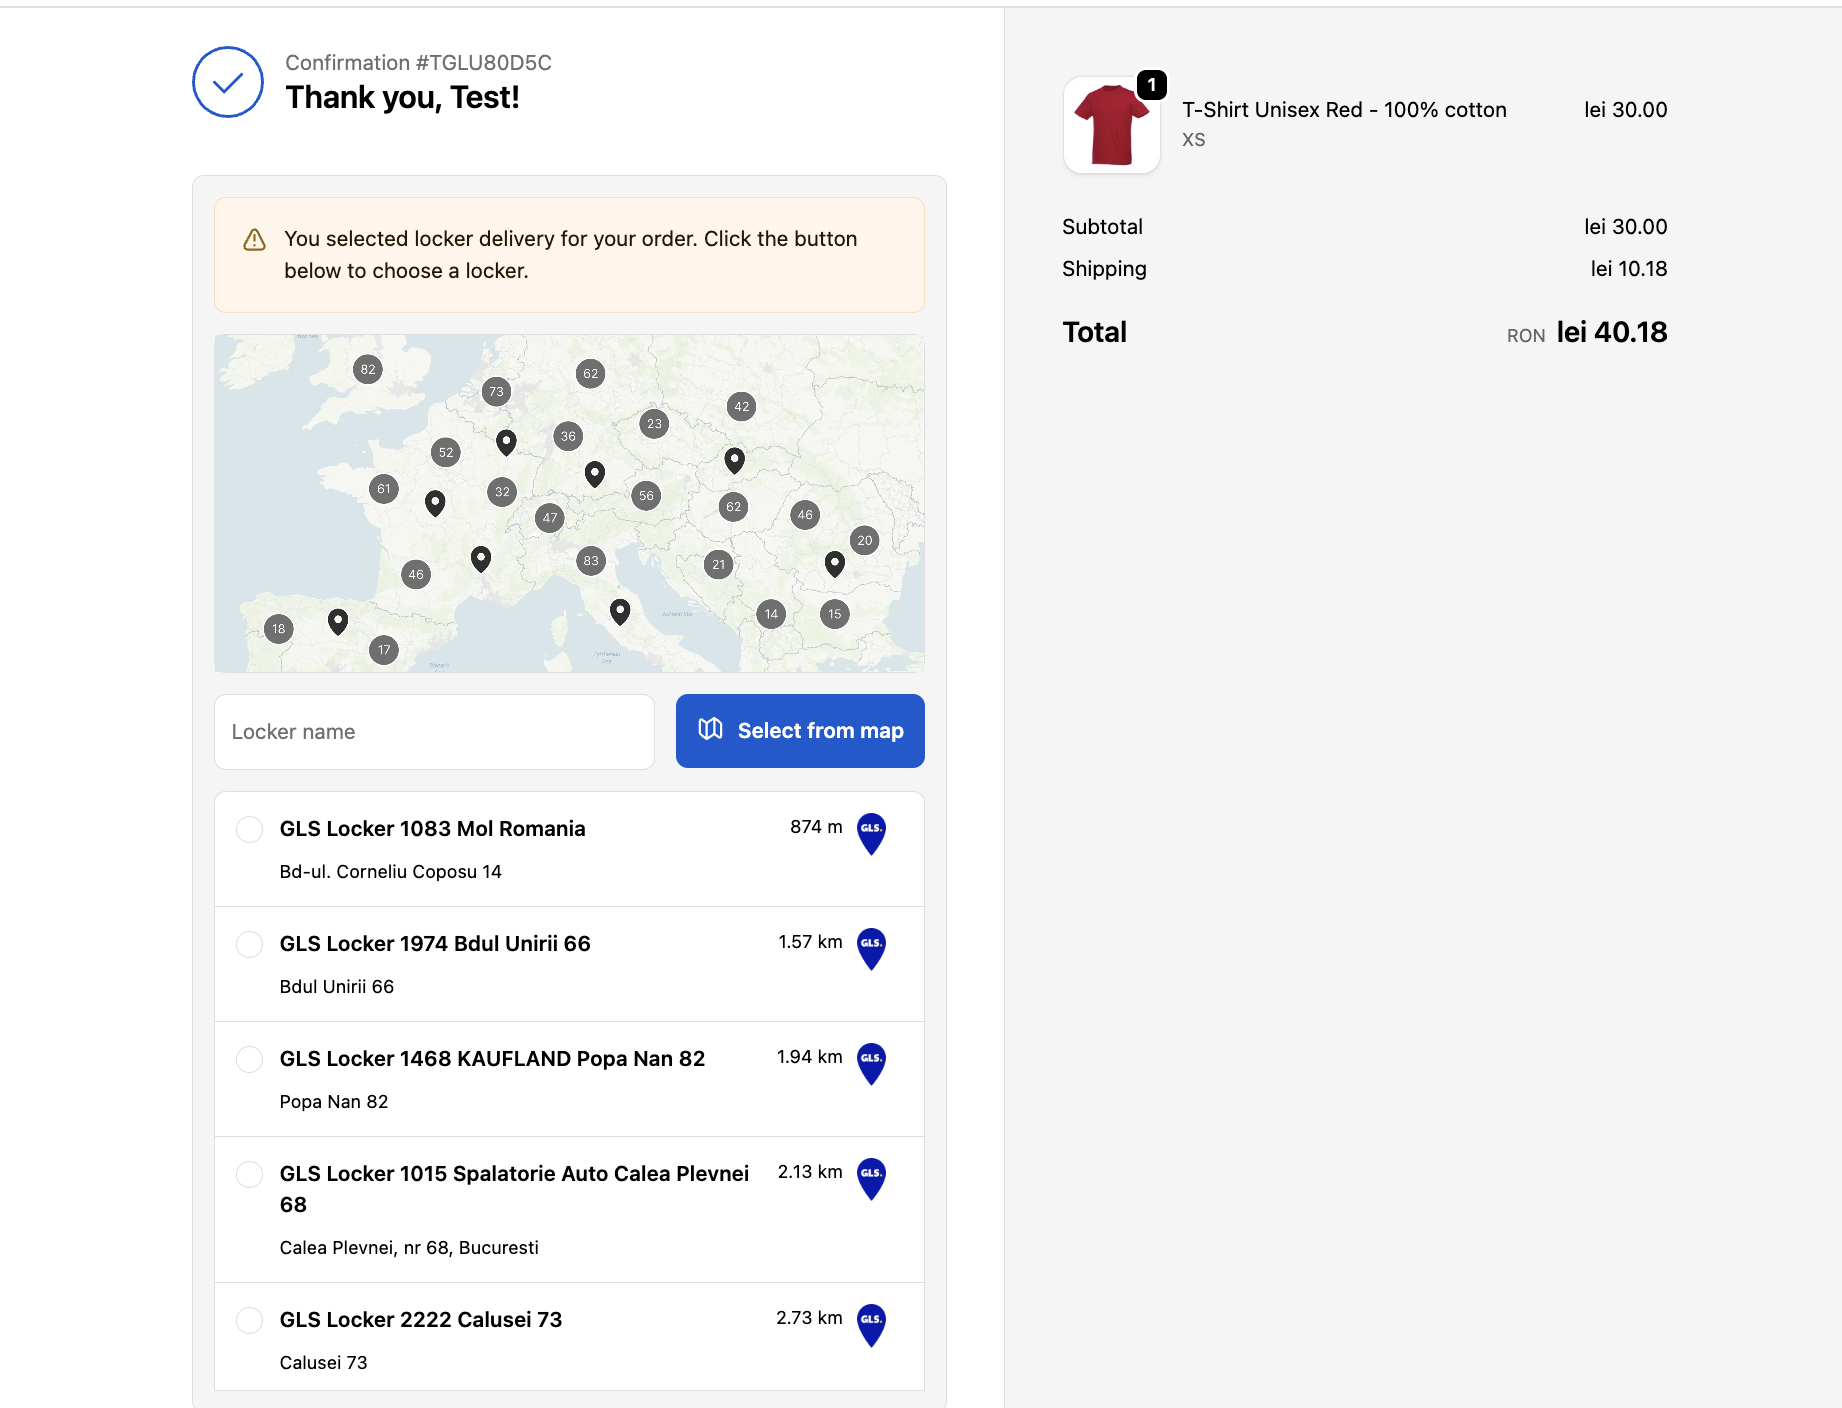
Send an email if the customer did not select a locker
Reconciliation
Based on the cash-on-delivery (COD) remittance report received from MyGLS, COD payments can be automatically recorded as collected:
- Shopify: the order payment status is updated from Payment pending to Paid
- Billing service: the invoice status is updated from Issued to Paid
Automated shipping label generation
Common errors
- API error: Courier API error: Missing mandatory data
Feel free to contact us if you need any further information:
Chat: click on the blue chat icon (bottom-right)
E-mail: support@xconnector.app
Phone: +4 0373 747 991
Was this article helpful?
That’s Great!
Thank you for your feedback
Sorry! We couldn't be helpful
Thank you for your feedback
Feedback sent
We appreciate your effort and will try to fix the article