A. Managing rejected parcels through the xConnector mobile app
2. Set the invoice revert automation
3. Set the shipping label cancel automation
B. Managing rejected parcels by canceling the order in Shopify
C. Managing rejected parcels by tracking status
A. Managing rejected parcels through the xConnector mobile app
To streamline handling of customer rejected parcels, use the xConnector mobile app to automate the entire process, turning minutes of manual work into a single tap.
Scan the shipping barcode - click Cancel order and that's it!
➡️ the order is automatically cancelled
➡️ the invoice is automatically reverted
➡️ the shipping label is cancelled (optional)
Click here to watch the video ⤵️

1. Install the xConnector app
- check in this article the section How to install the mobile application (click here)
2. Set the invoice revert automation
Step 1: Set the option to automatically revert the invoice when an order is cancelled
- xConnector - Profile - Preferences - Automation - Revert invoice on cancel order
Step 2: Ensure the xConnector mobile app is installed on your mobile device or professional scanner and log in by scanning the QR code from xConnector desktop app
- xConnector - Profile - Preferences - Mobile application - Scan the QR code
Step 3: When a returned parcel arrives, use the mobile app’s scan function to read the barcode on the shipping label.
Step 4: Once you scan the barcode - the order and its items will be displayed. Click “Cancel order” to initiate the cancellation in Shopify.

Step 5: Here, you have the option to cancel the order and optionally restock the products.
Select one of the options:
Cancel order (without restock)
Cancel order and restock

Once the order is canceled, the associated invoice will be automatically reverted and optional the shipping label will be automatically cancelled.
This solution works for couriers who do not change the tracking number for refused/returned packages. In order for a specific barcode to be identified, it must be the same as the one issued through xConnector.3. Set the shipping label cancel automation
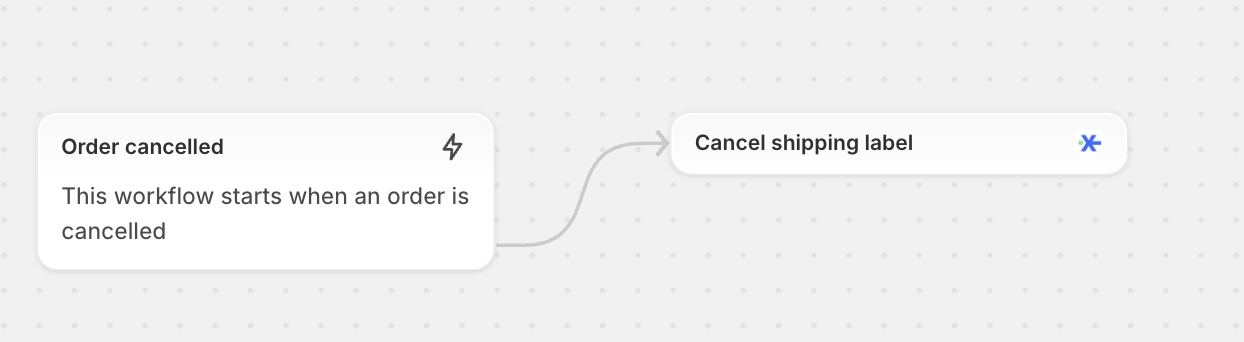
Automatically cancel the shipping label whenever the related order is cancelled.
See attached the Flow (click here) - import and activated it in Shopify Flows.
B. Managing rejected parcels by canceling the order in Shopify
If you don't want to use the xConnector mobile app to revert the invoices, than simply cancel the orders manually in Shopify .
When canceling an order in Shopify, you can opt for automating the reversal or cancellation of the invoice associated with the order.
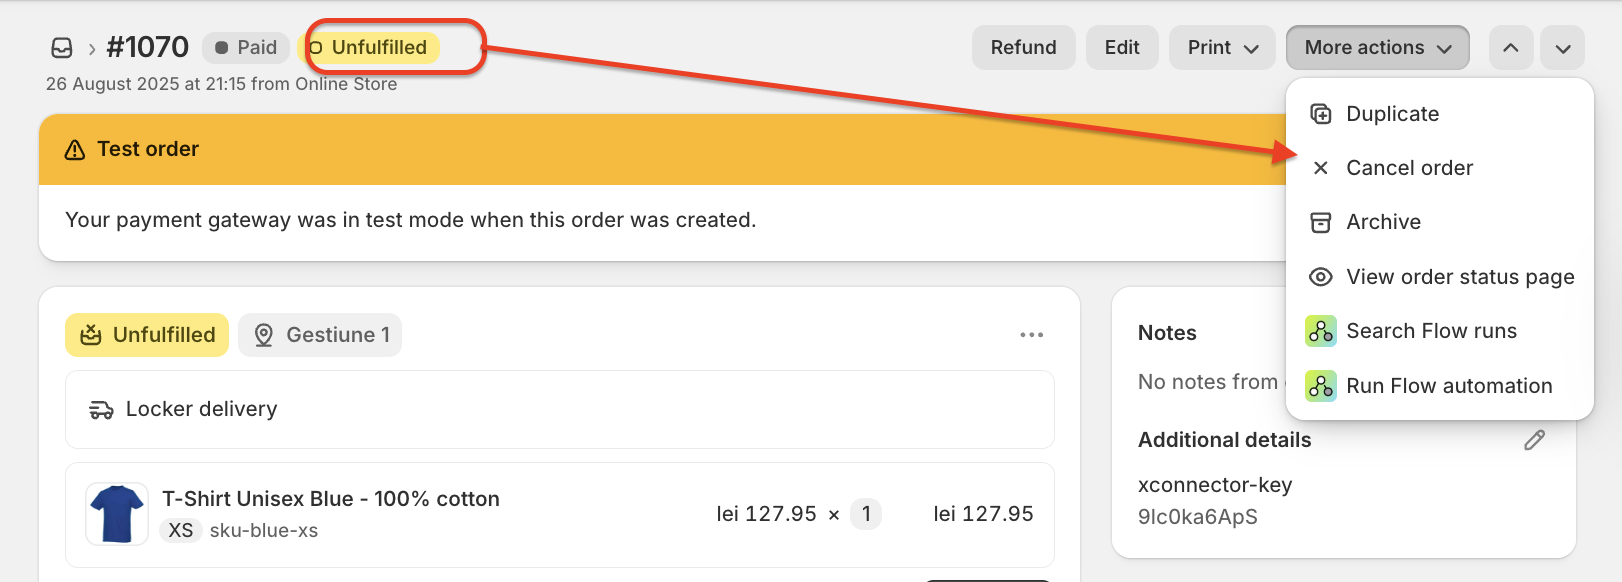
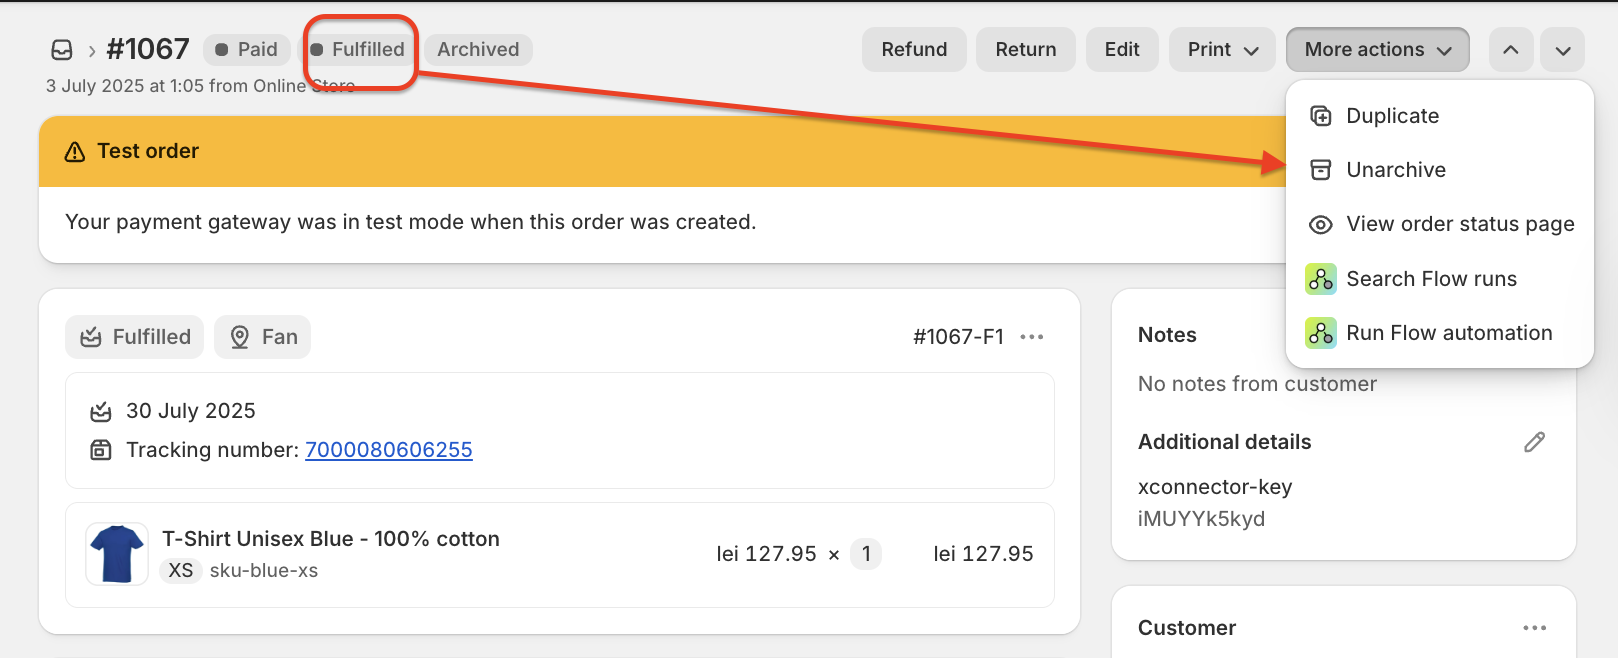
Shopify allows you to cancel the order only if it's Unfulfileld.
Step 1: In the xConnector app, activate the option Revert invoice on cancel order.
xConnector - Profile - Preferences - Automation - Revert invoice on cancel order

Step 2: Access the Shopify platform and manually cancel the respective order.
Step 3: After canceling the order, the associated invoice will be automatically reversed in xConnector, and consequently on the invoicing service platform.
How to cancel an order in Shopify
From your Shopify admin, go to Orders.
Click the order that you want to cancel.
Click More actions > Cancel order.
In the Reason for cancellation drop-down menu, select the reason for order cancellation.
Optional: In the Staff note field, enter an internal note about the order cancellation.
Optional: To restock the refunded items to your inventory, select Restock inventory.
Optional: To notify your customer about the order cancellation, select Send a notification to the customer.
Click Cancel order.
Available for case A and B


The advantage is that you have full control over canceled orders. You can make sure the parcel has been returned before canceling the order.


The disadvantage is that you need to follow the procedure individually for each parcel.
C. Managing rejected parcels by tracking status
Order cancellation based on tracking status is handled via Shopify Flow.
You can find detailed information and the preconfigured flow here.
The advantage is that you no longer need to manually cancel refused orders.

The disadvantage is that you do not have control over whether the refused parcels have been returned before the orders are canceled.
This feature is available for the Advanced subscription planFeel free to contact us if you need any further information:
Chat: click on the blue chat icon (bottom-right)
E-mail: support@xconnector.app
Phone: +4 0373 747 991
Was this article helpful?
That’s Great!
Thank you for your feedback
Sorry! We couldn't be helpful
Thank you for your feedback
Feedback sent
We appreciate your effort and will try to fix the article